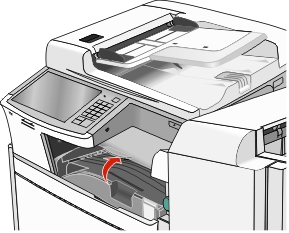
Open door A.
 | CAUTION—HOT SURFACE: The inside of the printer might be hot. To reduce the risk of injury from a hot component, allow the surface to cool before touching. |
Determine where the jam is located, and then remove it:
If the paper is visible under the fuser, firmly grasp it on each side, and then gently pull it out.
Note: Make sure all paper fragments are removed. 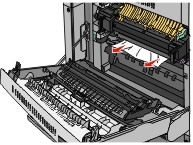
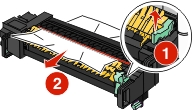
If the paper is not visible, then you will need to remove the fuser unit.
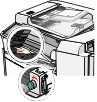
Warning—Potential Damage: Do not touch the center of the fuser unit. Doing so will damage the fuser. Remove the thumbscrew from each side of the fuser unit by rotating them counterclockwise.
Lift the handles on each side of the fuser, and then pull to remove the fuser unit.
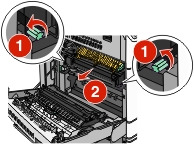
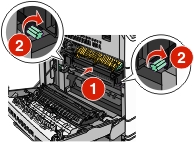
Lift the green lever, firmly grasp the paper on each side, and then gently pull it out.
Notes:
- Make sure all paper fragments are removed.
- If the paper is in the fuser, then lower the fuser nip release lever and switch it to envelope mode.
- After removing the jammed paper, return the lever to the proper position.
Align the fuser unit using the handles on each side, and then place it back into the printer.
Close door A.
If necessary, touch Continue from the printer control panel.