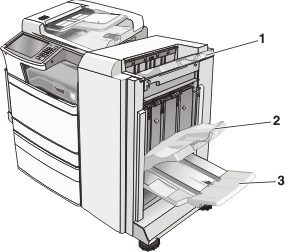
If the jammed paper is visible in any of the finisher exit bins, then firmly grasp the paper on each side, and then gently pull it out.
1 | Standard finisher bin |
2 | Finisher bin 1 |
3 | Finisher bin 2 Note: Finisher bin 2 is available only when a booklet finisher is installed. |
| Note: Make sure all paper fragments are removed. |
Open door H.
| Note: Door H is located between the finisher exit bins. |

Firmly grasp the jammed paper on each side, and then gently pull it out.
| Note: Make sure all paper fragments are removed. |
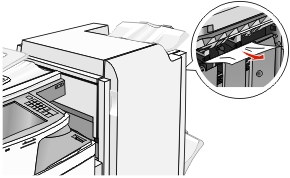
Close door H.
If necessary, touch Continue from the printer control panel.
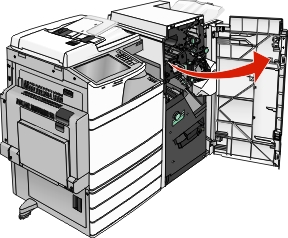
Open door G.
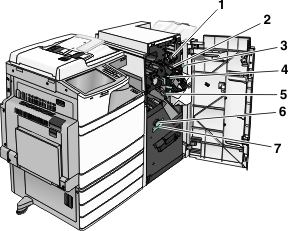
Area | Cover, knob, or handle name |
|---|---|
1 | Cover G1 |
2 | Cover G2 |
3 | Knob G3 |
4 | Cover G4 |
5 | Cover G7 |
6 | Knob G8 |
7 | Handle G9 |
Lift cover G1 lever.
Firmly grasp any jammed paper, and then gently pull it out.
| Note: Make sure to remove all paper fragments after gently pulling out any jammed paper inside door G. |
Move cover G2 to the right, and then remove any jammed paper.
| Note: If the paper is jammed in the rollers, then rotate knob G3 counterclockwise. |
Move cover G4 down, and then remove any jammed paper.
Move cover G7 to the left, and then remove any jammed paper.
Pull handle G9 until the tray is completely open.
Lift the inside cover. If the paper is jammed in the rollers, then rotate knob G8 counterclockwise, and then remove the jammed paper.
Close door G.
If necessary, touch Continue from the printer control panel.
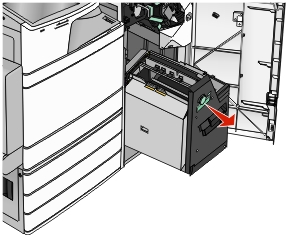
Open cover F.
Firmly grasp the jammed paper on each side, and then gently pull it out.
| Note: Make sure all paper fragments are removed. |
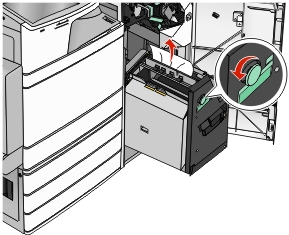
 |  |
| Note: If the paper jam on the right is difficult to remove, then rotate the knob counterclockwise. |
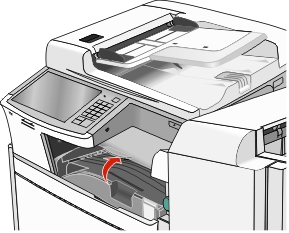
Close cover F.
If necessary, touch Continue from the printer control panel.