If these suggestions do not correct the problem, then contact customer support. You may have a printer part that requires adjustment or replacement.
Try one or more of the following:
Move the width and length guides in the tray to the correct positions for the paper size loaded.
Make sure the paper size setting matches the paper loaded in the tray:
From the printer control panel Paper menu, check the Paper Size setting.
Before sending the job to print, specify the correct size setting:
For Windows users, specify the size from Print Properties.
For Macintosh users, specify the size from the Page Setup dialog.
Try one or more of the following:
Make sure the paper type and weight settings match the paper loaded in the tray or feeder:
From the printer control panel Paper menu, check the Paper Type and Paper Weight settings.
Before sending the print job, specify the correct paper type setting:
For Windows users, specify the paper type from Print Properties.
For Macintosh users, specify the paper type from the Print dialog.
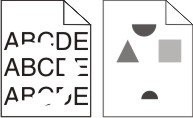
When appears, make sure that toner is distributed evenly among all four print cartridges or whichever color has the shadow images.
Remove the print cartridge.
| Warning—Potential Damage: Be careful not to touch the photoconductor drum. Doing so may affect the print quality of future print jobs. |
Firmly shake the cartridge side-to-side and front-to-back several times to redistribute the toner.
Reinsert the print cartridge.
| Note: If print quality does not improve, replace the print cartridge of the color that is giving a shadow. |
If the problem continues, the printer may need to be serviced. For more information, contact customer support.
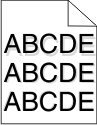
Select a lighter Toner Darkness setting:
From the printer control panel Quality menu, change the setting.
For Windows users, change the setting from Print Properties.
For Macintosh users, change the setting from the Print dialog.
Replace the toner cartridge.
These are possible solutions. Try one or more of the following:
Move the guides in the tray to the correct positions for the paper size loaded.
Make sure the paper size setting matches the paper loaded in the tray:
From the printer control panel Paper menu, check the Paper Size setting.
Before sending the job to print, specify the correct size setting:
For Windows users, specify the size from Print Properties.
For Macintosh users, specify the size from the Page Setup dialog.
 |  |
Try one or more of the following:
Replace the defective toner cartridge.
Replace the defective photoconductor unit.
Replace the defective transfer module.
Open the front door, and then the internal cover.
Locate the printhead wipers.
Gently pull the printhead wiper out until it stops, and then slowly slide it back into place.
Clean the remaining three printhead lenses.
Try one or more of the following:
Make sure the paper type and weight settings match the paper loaded in the tray or feeder:
From the printer control panel Paper menu, check the Paper Type and Paper Weight settings.
Before sending the print job, specify the correct paper type setting:
For Windows users, specify the paper type from Print Properties.
For Macintosh users, specify the paper type from the Print dialog.
Paper absorbs moisture due to high humidity. Store paper in its original wrapper until you use it.
Try one or more of the following:
The paper may have absorbed moisture due to high humidity. Store paper in its original wrapper until you use it.
Make sure the paper type and weight settings match the paper loaded in the tray or feeder:
From the printer control panel Paper menu, check the Paper Type and Paper Weight settings.
Before sending the print job, specify the correct paper type setting:
For Windows users, specify the paper type from Print Properties.
For Macintosh users, specify the paper type from the Print dialog.
Replace the worn or defective toner cartridge.
Replace the defective transfer module. For more information, see the instruction sheet that came with the replacement part.
Replace the defective fuser. For more information, see the instruction sheet that came with the replacement part.

Try one or more of the following:
The Toner Darkness setting may be too dark, the Brightness setting may be too dark, or the Contrast setting may be too high.
Change these settings from the printer control panel Quality menu.
For Windows users, change these settings from Print Properties.
For Macintosh users:
Choose File > Print.
From the “Orientation pictures” menu, choose Printer Features.
Choose a lower value for the Toner Darkness, Brightness, and Contrast settings.
The paper may have absorbed moisture due to high humidity. Store paper in its original wrapper until you use it.
Make sure the paper type setting matches the paper loaded in the tray or feeder:
From the printer control panel Paper menu, check the Paper Type setting.
For Windows users, check this setting from Print Properties.
For Macintosh users, check this setting from the Print dialog.

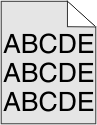
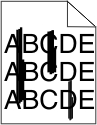
Try one or more of the following:
The Toner Darkness setting may be too light, the Brightness setting may be too light, or the Contrast setting may be too low.
Change these settings from the printer control panel Quality menu.
For Windows users, change these settings from Print Properties
For Macintosh users:
Choose File > Print.
From the Orientation pictures drop-down menu, choose Printer Features.
Choose a higher value for the Toner Darkness, Brightness, and Contrast settings.
The paper may have absorbed moisture from high humidity. Store paper in its original wrapper until you use it.
Make sure the Paper Type setting matches the paper loaded in the tray or feeder:
From the printer control panel Paper menu, check the Paper Type setting.
For Windows users, check this setting from Print Properties.
For Macintosh users, check this setting from the Print dialog.
Try one or more of the following:
Remove the cartridge and make sure the packing material is properly removed. Reinstall the cartridge.
When appears, make sure that toner is distributed evenly among all four cartridges:
Remove the cartridge.
| Warning—Potential Damage: Be careful not to touch the photoconductor drum. Doing so may affect the print quality of future print jobs. |
Firmly shake the cartridge side-to-side and front-to-back several times to redistribute the toner.
Reinsert the cartridge.
| Note: If print quality does not improve, then replace the cartridge of the color that is not printing. |
If the problem continues, then the printer may need to be serviced. For more information, contact customer support.
Try one or more of the following:
The photoconductor unit may be defective if marks occur repeatedly in only one color and multiple times on a page.
Replace the photoconductor unit if the defects occur every 94.2 mm (3.71 in.) or 37.68 mm (1.48 in.).
The fuser may be defective if the marks occur down repeatedly in all colors.
Replace the fuser if the defects occur every 141 mm (5.55 in.).
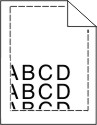
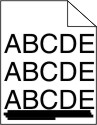
Try one or more of the following:
Adjust the length and width guides in the tray to the correct positions for the paper size loaded.
Make sure the guides are not too far from the paper stack.
Make sure the guides are not pressing too lightly against the paper stack.
Make sure you are using paper that meets the printer specifications.
Make sure that the printer is turned off and unplugged from the wall outlet.
| Warning—Potential Damage: To avoid the risk of electric shock when cleaning the exterior of the printer, unplug the power cord from the wall outlet and disconnect all cables to the printer before proceeding. |
Remove paper from the standard exit bin.
Dampen a clean, lint-free cloth with water.
| Warning—Potential Damage: Do not use household cleaners or detergents, as they may damage the finish of the printer. |
Wipe only the exterior of the printer, making sure to include the standard exit bin.
| Warning—Potential Damage: Using a damp cloth to clean the interior may cause damage to your printer. |
Make sure the paper support and standard exit bin are dry before beginning a new print job.
Turn the printer off using the power switch, and then unplug the power cord from the wall outlet.
Remove the paper feed rollers.
| Note: For instructions on how to remove and reinstall the paper feed rollers, see the setup sheet that came with the rollers inside the compartment box of Tray 1. |
Dampen a clean, lint-free cloth with water.
Clean the paper feed rollers.
| Warning—Potential Damage: Do not touch the rubber. Doing so will damage the rollers. |
Reinstall the paper feed rollers.
| Note: Make sure to replace the worn or defective paper feed rollers. |
 |  |
Try one or more of the following:
If the fill pattern is incorrect, choose a different fill pattern from your software program.
Use only the recommended transparencies.
Ensure that the Paper Type setting matches what is loaded in the tray or feeder.
Ensure that the Paper Texture setting is correct for the type of paper or specialty media loaded in the tray or feeder.
When appears, make sure the toner is distributed evenly within the print cartridge:
Remove the print cartridge.
| Warning—Potential Damage: Be careful not to touch the photoconductor drum. Doing so may affect the print quality of future print jobs. |
Firmly shake the cartridge side-to-side and front-to-back several times to redistribute the toner.
Reinsert the print cartridge.
If the problem continues, the printer may need to be serviced. For more information, contact Customer Support.
Try one or more of the following:
From the printer control panel Paper Menu, select Default Source.
For Windows users, select the paper source from Print Properties.
For Macintosh users, select the paper source from the Print dialog and pop-up menus.
Replace the worn, defective, or empty toner cartridge.
 | CAUTION—HOT SURFACE: The inside of the printer might be hot. To reduce the risk of injury from a hot component, allow the surface to cool before touching. |
Clear any paper you see or clean any visible toner from the paper path. If the problem persists, then contact Customer Support.
Try one or more of the following:
From the printer control panel Paper menu, select Default Source
For Windows users, select the paper source from Print Properties.
For Macintosh users, select the paper source from the Print dialog and pop-up menus.
Replace the worn, defective, or empty toner cartridge.
Check the paper path around the toner cartridge.
| | CAUTION—HOT SURFACE: The inside of the printer might be hot. To reduce the risk of injury from a hot component, allow the surface to cool before touching. |
Clear any paper you see.
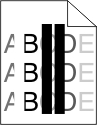
Try one or more of the following:
Reinstall or replace the defective toner cartridge.
Replace the worn or defective transfer module.
Replace the word or defective photoconductor unit.
Replace the worn or defective fuser.
Perform color adjust from the Quality menu.
Check the application settings.
Contact customer support.

Try one or more of the following:
Make sure the paper type and weight settings match the paper loaded in the tray or feeder:
From the printer control panel Paper menu, check the Paper Type and Paper Weight settings. Change the Paper Weight setting from Normal to Heavy.
Before sending the print job, specify the correct paper type setting:
For Windows users, specify the paper type from Print Properties.
For Macintosh users, specify the paper type from the Print dialog.
From the printer control panel Paper menu, make sure the Paper Texture setting matches the paper loaded in the tray or feeder. If necessary, change the Paper Texture setting from Normal to Rough.
Replace the worn or defective fuser. For more information, see the instruction sheet that came with the replacement part.
Try one or more of the following:
Use only transparencies that meet the printer specifications.
Make sure the paper type setting is set to Transparency:
From the printer control panel Paper menu, check the Paper Type setting.
Before sending the job to print, specify the correct type setting:
For Windows users, specify the type from Print Properties.
For Macintosh users, specify the type from the Print dialog.