 Programs Lexmark 2200 Series Lexmark All-In-One Center.
The All-In-One software consists of four main components:
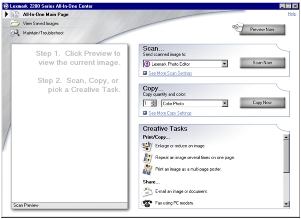
Use the Lexmark All-In-One Center software to scan, copy, and fax documents. There are three ways to open the All-In-One Center:
Programs Lexmark 2200 Series Lexmark All-In-One Center.
The All-In-One Main page consists of four main sections: Scan, Copy, Creative Tasks, and Preview.
Note: For more information about the All-In-One Main page, click the Help button located in the upper right corner of the screen.
Use the View Saved Images page to perform tasks with images that are saved on the computer. The View Saved Images page consists of three sections.
|
From this section |
You can |
|---|---|
|
Open with |
Select a program to send the saved image to. |
|
Print a Copy |
Note: Click See More Copy Settings to view all settings. |
|
Creative Tasks |
Select from a variety of creative ideas. For help, see Creative Tasks. |
Note: For more information about this page, click the Help button located in the upper right corner of the screen.
The Maintain/Troubleshoot page provides you with direct links to the Lexmark Solution Center. Choose from these topics:
For more information about the Lexmark Solution Center, see Using the Lexmark Solution Center.
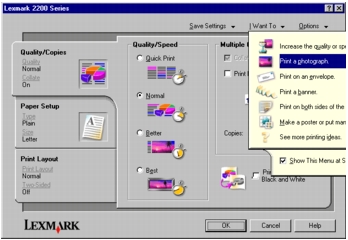
Print Properties is the software that controls the All-In-One printing function. You can change the settings in Print Properties based on the type of project you want to create. You can open Print Properties from almost any program:
The Print Properties screen displays along with the I Want To menu.
Note: Some programs open Print Properties differently.
The I Want To menu displays when you open Print Properties. It contains a variety of task wizards to help you select the correct print settings for your project. Click Close for a full view of the Print Properties dialog box.
All of the print settings are on the three main tabs of the Print Properties software: Quality/Copies, Paper Setup, and Print Layout.
Note: For additional information about these settings, right-click a setting on the screen, and then select the What's This? item.
From the Save Settings menu, you can name and save the current Print Properties settings for future use. You can save up to five custom settings.
Use the Options menu to make changes to the Quality Options, Layout Options, and Printing Status Options settings. For more information on these settings, open the tab dialog box from the menu, and then click the Help button on the dialog box.
The Options menu also provides you with direct links to different parts of the Lexmark Solution Center (see Using the Lexmark Solution Center), as well as software version information.
The Lexmark Solution Center is a valuable information resource. To open the Lexmark Solution Center, click Start Programs Lexmark 2200 Series Lexmark Solution Center.
The Printer Status tab displays.
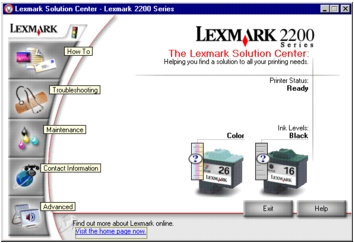
The Lexmark Solution Center consists of six tabs: Printer Status, How To, Troubleshooting, Maintenance, Contact Information, and Advanced.
Note: For more information, click the Help button located in the lower right corner of the screen.
Use the Lexmark Photo Editor software to edit graphics or photos before you print them. To open the Lexmark Photo Editor, click Start Programs Lexmark 2200 Series Lexmark Photo Editor.
The Lexmark Photo Editor displays.
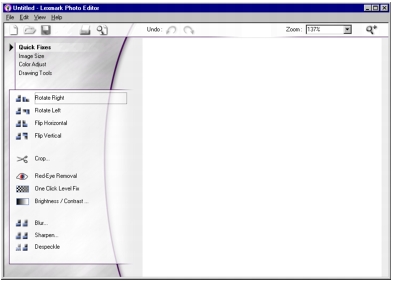
Use the available tools to edit your graphic.
Note: Move your mouse pointer over the tool for a description.