Back to Main Page

Printing handouts

  1. Load paper into the paper support.
  2. Customize the settings in the Page Setup dialog.
    1. From the software application, choose File  Page Setup.
    2. From the "Format for" pop-up menu, choose 3300 Series.
    3. From the "Settings" pop-up menu, choose Page Attributes.
    4. Choose a paper size.
    5. Select an orientation.
    6. Click OK.
  3. Customize the settings in the Print dialog.
    1. From the software application, choose File  Print.
    2. From the "Printer" pop-up menu, choose 3300 Series.
    3. From the pop-up menu that says "Copies & Pages", choose Quality & Media.
      • Choose a media type.
      • Note: The All-In-One has a Paper type sensor. If Automatic is not chosen in the Media Type pop-up menu, choose Plain.
      • Select an orientation.
      • Note: Normal is the default. Higher print quality settings result in better quality documents, but may take longer to print.
    4. From the pop-up menu that says "Copies & Pages", choose Layout.
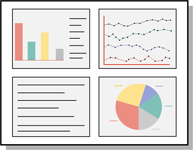
      • From the "Pages per Sheet" pop-up menu, choose the number of pages you want to print
        on one sheet.
      • From Layout Direction area, click the graphic that shows the order you want the pages to print
        on the sheet.
      • If you want to print a border around each image, choose an option from the "Border" pop-up menu.
    5. Click Print.
      Note: The Paper exit tray holds up to 25 sheets of plain paper. To print more than 25 sheets, remove the first 25 sheets, and then continue printing.
Related topics

Choosing a paper size

Choosing a media type

Loading paper

Selecting an orientation

Selecting a print quality

Back to Printing
Back to Main Page