Click Preview/Edit in the Copy tab of the Lexmark 3300 Series Center to further adjust copy settings and do creative copying jobs.
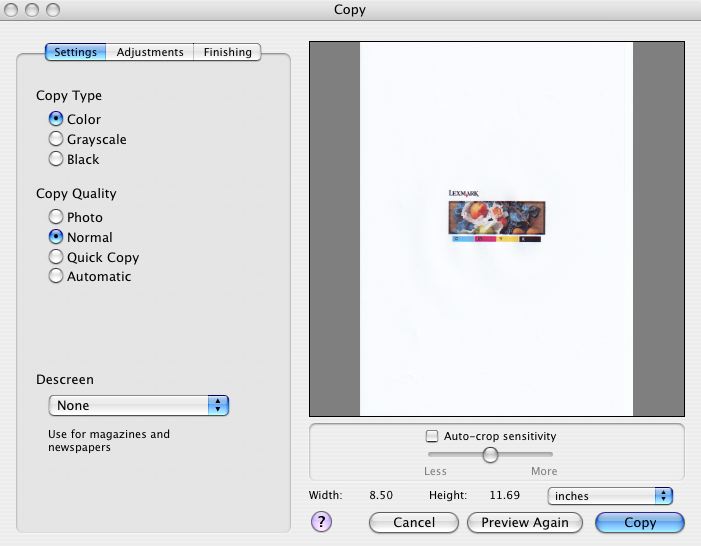
The Copy dialog has four main sections: the Settings tab, the Adjustments tab, the Finishing tab, and the Preview/Edit area. The following buttons are at the bottom of the Preview/Edit area:
Go to the Help Center for more information. | |
Cancel | Exit the current dialog without any changes. |
Preview Again | Apply the settings and refresh the image in the Preview/Edit area. |
Copy | Start copying. |
The following table has detailed information about the different copy settings and options in the Copy dialog.
Settings tab | Copy Type | Select the color for the copy. Options are:
|
Copy Quality | Select the copy quality. Options are:
| |
Descreen | Remove wavy patterns from magazines or newspapers. Many types of printed media are created using a screen printing process. Screen printing results in documents that are made up of many small dots that, when viewed from a distance, form the contents of the document. This screen printing pattern of dots is often exaggerated by scanning. The result is typically noticeable as a geometrical pattern appearing in what should be solid colors. Descreening helps remove the screen printing pattern of dots. Choose from Photo, Text, Art Print, Magazine, Newspaper, or None. | |
Adjustments tab | Brightness | Adjust the lightness or darkness of the scan. |
Contrast | Adjust the detailing and tone of the image as it is set off against a light or dark background. Increasing contrast makes light colors lighter and dark colors darker. | |
Gamma | Increase or decrease the color correction curve. Decreasing the gamma causes more ink to be placed on the page, and darkens the printed document. Increasing the gamma causes less ink to be placed on the page, and lightens the printed document. | |
Blur/Sharpen | Adjust the level of sharpness of the scanned image. | |
Fine Tune Rotation | Tilt the image 10 degrees to the left or to the right using the Tolerance bar. | |
Invert Colors | Reverse the colors of the image by inverting the RGB data. The effect created is similar to that of a film negative. | |
Mirror | Produce a mirror image of the document. | |
Orientation | Shift between Portrait and Landscape orientation by clicking the icons. | |
Defaults | Reset the Adjustment controls to the factory default settings. | |
Finishing tab | Resize | Enlarge or reduce the image. Choose a preset value or enter a desired scale percentage for the image. |
Layout |
| |
Borderless Printing Option |
| |
Preview/Edit area | See a preview of the image. Some settings in the Copy dialog are interactive so you can view the changes on the image as you adjust the settings. Click Preview Again to apply the settings. The image is rescanned, and the recent changes are shown in the Preview area. | |
Auto-crop sensitivity | Select or clear Auto-crop sensitivity to turn auto-cropping on or off. Adjust the Auto-crop sensitivity Tolerance bar to fine-tune auto-cropping. | |
Width and height | See the dimension of the scanned image. Select the preferred unit of measurement from the pop-up menu. | |