|
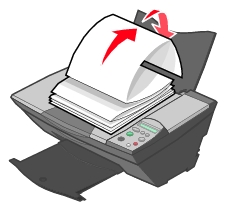
Load
|
Make sure
|
|
Up to 100 sheets of inkjet paper (depending on the thickness)
|
- The print side is facing you.
- The paper guide rests against the edge of the paper.
|
|
Up to 10 iron-on transfers
|
- The print side (blank side) is facing you.
- The paper guide rests against the edge of the iron-on transfers.
- You follow the loading instructions on the iron-on transfer packaging.
|
|
Up to 25 sheets of photo/glossy paper
|
- The glossy or coated side is facing you.
- You use photo paper that is made for inkjet printers.
- If your paper came with instructions, you read them carefully.
- You load the photo paper vertically against the right side of the paper support.
- The paper guide rests against the edge of the photo paper.
Note: To prevent smudging, remove each photo as it exits the All-In-One, and then let it dry before stacking.
|
|
Note: Make sure you select the correct paper size for your project.
|
|
Banner paper
|
- You remove any paper from the paper support before inserting banner paper.
- You place a stack of banner paper on or behind the All-In-One, with only the number of sheets you need to print your banner.
Note: You must select A4 or Letter size Banner paper size in Print Properties. Failure to do so will cause a paper jam. See Jams and misfeeds troubleshooting.
- You load the leading edge of the banner paper into the All-In-One against the right side of the paper support.
- You squeeze and slide the paper guide to the left edge of the banner paper.
|
|
Up to 25 sheets of greeting card stock, postcards, or photo cards
|
- If your cards include instructions, you read them carefully.
- The print side is facing you.
- The cards are loaded vertically against the right side of the paper support.
- You do not force the cards into the All-In-One.
- You squeeze and slide the paper guide to the left side of the cards.
|
|
Note: Make sure you select the correct paper size for your project.
|
|
Up to 20 transparencies
|
- The rough sides of the transparencies are facing you.
- The paper guide rests against the edge of the transparencies.
Note: Since transparencies and photos require more drying time, we recommend that you remove each transparency or photo as it exits and allow it to dry to avoid ink smudging.
|
|
Up to 100 sheets of coated or premium paper
|
- If your paper includes instructions, you read them carefully.
- You load the paper vertically against the right side of the paper support.
- If there is a special mark on the paper, you place the mark facing away from you.
- You do not force the paper into the All-In-One.
- You squeeze and slide the paper guide to the left side of the paper.
|
|
Note: Make sure you select the correct paper size for your project.
|
|
Up to 10 envelopes
|
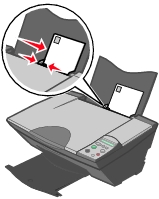
- The print side is facing you.
- The envelopes are loaded vertically against the right side of the paper support.
- The stamp location is in the upper left corner.
- The paper guide rests against the edge of the envelopes.
Note: Do not load envelopes with:
- Holes, perforations, or deep embossing.
- Metal clasps, string ties, or metal folding bars.
- Exposed flap adhesive.
|
|
Note: Make sure you select the correct paper size for your project.
|