 Receiving a fax
Sending a fax
Customizing a fax job
You can use your All-In-One to send color or black and white faxes. You can send and receive A4, legal, and letter size documents.
Receiving a fax
You can choose to receive a fax automatically, manually, or through an answering machine.
Note: For your All-In-One to send or receive a color fax, the machine from which you are receiving must also support color faxing.
Automatically
Recommended for a dedicated fax line.
Your All-In-One is set up to accept incoming faxes automatically using the automatic answering mode. This mode is indicated by the Auto Answer light. When the Auto Answer light is on, the All-In-One receives a fax after the specified number of rings set in the Options menu.
If you change your settings and want to reset to automatic answering mode:
- On the control panel, press Fax.
- Press Options until Number of rings appears.
- Press the right arrow to choose After 2 rings, After 3 rings (default), or After 5 rings.
- Press Select.
- Make sure the Auto Answer light on the All-In-One is on.
When the number of rings that you set is detected, the All-In-One automatically receives your fax.
Manually
Recommended for a shared fax and telephone line.
You can choose which incoming faxes to accept by setting the All-In-One to manual answering mode.
- On the control panel, press Fax.
- Make sure the Auto Answer light on the All-In-One is off.
- If your All-In-One has a handset: When your All-In-One rings, pick up the handset and listen for the fax calling tones.
If your All-In-One does not have a handset: When your connected telephone rings, pick up the telephone handset and listen for the fax calling tones.
Note: Your All-In-One must be connected to a telephone to receive faxes manually. For help, see Connecting to a telephone.
- If your All-In-One has a handset:
- Press Black or Color.
- Hang up the handset.
Your All-In-One receives the fax.
If your All-In-One does not have a handset:
- Press *9* on the telephone.
- Hang up the telephone.
Your All-In-One receives the fax.
Answering machine
Recommended for a shared fax and telephone line.
To receive a fax if your All-In-One is connected to an answering machine:
- On the control panel, press Fax.
- Set the answering machine to answer incoming calls before the All-In-One does. For example, if you set the answering machine to answer calls after 3 rings, set the All-In-One to answer calls after 5 rings. To change this setting on the All-In-One:
- Press Options until Number of rings appears.
- Press the right arrow until After 5 rings appears.
- Press Select.
- Make sure the Auto Answer light on the All-In-One is on.
When a ring is detected, the answering machine picks up the call.
- If a fax is detected, the All-In-One receives the fax, and disconnects the answering machine.
- If not, the answering machine completes the call.
Note: You must set up the equipment as shown in Connecting to an answering machine for it to work properly.
Sending a fax
You can send faxes using the control panel, the All-In-One Center, or the fax driver.
Using the control panel
- Make sure your All-In-One is on.
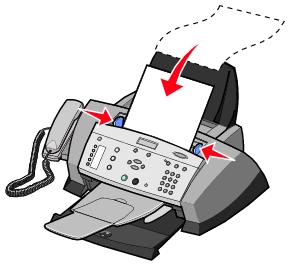
- Load up to 30 sheets of your original document face down in the ADF.
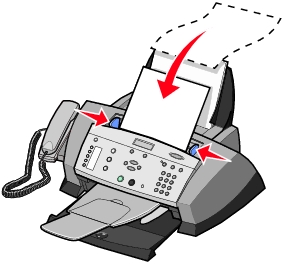
Note: When you load small paper sizes, place your original in the center of the tray and adjust the paper guides to the edges of the paper.
- On the control panel, press Fax.
- Use the keypad to:
- Enter the fax number, and then press Black or Color.
- Press Speed Dial, and then:
- Use the arrow keys to scroll through the list to find the number you want, and then press Black or Color.
- Use the keypad to enter a two-digit number (viewable in the upper left of the display), and then press Black or Color.
Note: If you do not have a speed dial list, but want to create one, see Using the computer (recommended).
The All-In-One scans your document and sends your fax to the number you entered.
Using the All-In-One Center
- Make sure your All-In-One is attached to a computer.
- Load up to 30 sheets of your original document face down in the ADF.
Note: When you load small paper sizes, place your original in the center of the tray and adjust the paper guides to the edges of the paper.
- From your desktop, double-click the Lexmark 4200 Series All-In-One Center icon.
The All-In-One Main Page appears.
- Under Productivity Tools, click Fax an image or document.
- Follow the instructions on your screen to complete the task.
Sending a soft copy fax
You can create a soft copy document on your computer and send a black and white fax of it to someone else.
Note: You cannot receive soft copy faxes, only send them. All incoming faxes will print from your All-In-One.
To send a fax from your computer program using the fax modem in your All-In-One:
- With your document open, click File
 Print.
- In the printer list, select Fax Lexmark 4200 Series.
- Follow the instructions in the program that launches.
Note: All faxes sent using the soft copy feature appear in Fine resolution.
Customizing a fax job
There are several fax features on your All-In-One that make sending faxes more efficient. You can use the control panel or the software to use the fax features and to customize your faxes. For a complete list of the control panel Fax menu options, see Using the control panel.
Setting up Speed Dial
Using the computer (recommended)
- Click Start Programs Lexmark 4200 Series All-In-One Fax Setup Utility.
- Click the Speed Dial tab.
- Follow the instructions on the Speed Dial tab to add a new number to your speed dial list.
- Press Save Settings after you finish your updates. Nothing is saved until you press this button.
Using the control panel
- On the control panel, press Fax.
- Press Options until Edit Speed Dial appears on the display.
- Press Select.
- Enter a two-digit speed dial number, and then press Select.
- Enter the fax number.
- Enter the name using the keypad. Press the key more than once to scroll through letters.
- Press Select when you are finished.
Saved appears on the screen.
Using Speed Dial
To make sending faxes easier, you can enter up to 99 speed dial numbers. You can enter 79 individual fax numbers and 20 groups that can hold up to five phone numbers each.
- On the control panel, press Fax.
- Press Speed Dial.
The first speed dial number in the list appears.
- Scroll through the list using the left and right arrow buttons or use the keypad to enter the two-digit speed dial number.
- Press Black or Color to send your fax.
Quick dial buttons
You can access speed dial numbers 1-5 with the quick dial buttons. These buttons are automatically programmed when you program the first five speed dial numbers. To send a fax using a quick dial button:
- Make sure your All-In-One is on.
- Load up to 30 sheets of your original document face-down in the ADF.
- Press the quick dial button of your choice.
- Press Black or Color.
Sending a multi-page fax to a group
If your All-In-One is attached to a computer, you can send a fax of up to 20 pages to as many as five people at once.
To send a broadcast fax immediately
- On the control panel, press Fax.
- Enter a fax number or press Speed Dial to select numbers from your speed dial list.
- Press Black or Color to send the fax immediately or press Select to enter another fax number.
- Press Black or Color to send the fax to both numbers or press Select to enter another fax number. Continue this procedure until all of the fax numbers (up to five numbers) have been entered.
To delay sending a broadcast fax
- On the control panel, press Fax.
- When the default screen appears, press Options until Delay Until appears.
- Use the right arrow button to scroll to Set Delay.
- Press Select.
- Enter the time you want your fax to send.
- Press Select.
- If your All-In-One is in 24-hour mode, the screen will return to the default display. If the machine is set to 12-hour mode, press 1 for AM or 2 for PM.
- Using the keypad, enter the fax number.
- Press Black or Color to send your fax to this number or press Select to enter another fax number (you can do this up to five times and the delayed fax will be sent to as many numbers as you entered).
Note: At the designated time, the fax numbers are dialed and the fax transmitted to all of the designated fax numbers. If the fax transmission is unsuccessful to any of the numbers on the broadcast list, the unsuccessful numbers will be tried again at the end of the list.
Using your Speed Dial list:
- On the control panel, press Fax.
- Press Options until Delay Until appears.
- Use the left and right arrows to scroll to Set Delay, and then press Select.
- Enter the information about when you want your fax to send.
- Press Select again, and then press 1 for AM or 2 for PM.
- Press Speed Dial, and then:
- Use the arrow buttons to scroll through the speed dial list to find the desired fax number.
- Press the keypad buttons to enter a two-digit number (viewable in the upper left corner of the display).
- Press Color or Black.
The default screen appears again.
Note: You can repeat this process to enter more numbers to which you want to send a delayed fax.
On Hook Dial
On Hook Dial is an option that lets you access the phone line before sending a fax. Use this option for special cases, such as to navigate an automated answering system or to enter a calling card number before sending a fax.
- On the control panel, press Fax.
- Press Options repeatedly until On Hook Dial appears.
- Press Select to make the All-In-One go off hook.
You can now hear the dial tone of the phone line.
- Enter the number to which you want to send a fax.
- Press the keypad numbers to navigate an automated answering system.
- Press Black or Color when you hear fax tones.
Redial/Pause
Use Redial/Pause to redial a fax number or to enter a space in a fax number.
- When the All-In-One is in Fax mode, press Redial/Pause to redial the last number entered.
Note: If you press this button immediately after you send a fax, the fax settings from the previous fax are used.
- Press Redial/Pause to insert a three-second pause in a fax number you have already begun entering. You may need to enter a pause in a fax number to wait for an outside line or to wait for prompts in an automated answering system.
Dialing behind a PBX
If your All-In-One is connected to a PBX phone system, you may need to set the Dialing method to Behind a PBX. Ordinarily, when dialing a fax number, the All-In-One waits to recognize the dial tone and then dials the fax number. However, this method of dialing may not work if your PBX phone system has a dial tone that is not recognizable to most fax machines. Dialing behind a PBX enables the All-In-One to dial the fax number without waiting to recognize the dial tone.
To set the All-In-One to dial Behind a PBX:
- On the control panel, press Fax.
- Press Options repeatedly until Advanced Fax appears, and then press Select.
- Press Options repeatedly until Dialing Method appears, and then press Select.
- Use the right arrow button to scroll to Behind a PBX, and then press Select.
When you send a fax, the All-In-One dials behind the PBX phone system.
Distinctive ring patterns
Distinctive ring is a service provided by some telephone companies that assigns multiple phone numbers to a single telephone line. If you subscribe to this service, you can program your All-In-One to have a distinctive ring pattern and phone number for incoming faxes.
To use distinctive ring for faxing:
- Order the distinctive ring service from your telephone company.
- On the control panel, press Fax.
- Press Options repeatedly until Advanced Fax appears, and then press Select.
- Press Options repeatedly until Distinctive ring appears.
- Select a distinctive ring:
- Distinctive Ring 1 (double ring)
- Distinctive Ring 2 (triple ring)
- Call the fax line number within three minutes.
Auto Answer
Press the Auto Answer button to turn the automatic answering function on or off. When the Auto Answer light is on, the automatic answering function is on.
If you decide to use Auto Answer, you can set the number of rings before the fax is received. The default is set to After 3 rings. To change this setting:
- On the control panel, press Fax.
- Press Options until Number of rings appears.
- Press the right arrow to choose After 2 rings, After 3 rings (default), or After 5 rings.
- Press Select.
- Make sure the Auto Answer light is on.
When the number of rings that you set is detected, the All-In-One automatically receives your fax.
If you want to receive faxes manually, make sure the Auto Answer light is off. For more information on receiving faxes manually, see Manually.
Fax forwarding
You might want to set up fax forwarding if you are going on a trip, but still want to receive your faxes while you are away. There are three fax forwarding settings:
- Off (default)
- Forward-When your All-In-One receives a fax, it holds it in memory and then sends it to the fax number that you designate.
- Print and Forward-Your All-In-One forwards the fax to the designated fax number and prints the fax.
To set up fax forwarding:
- On the control panel, press Fax.
- Press Options until Fax Forward appears, and then press Select.
- Use the arrow buttons to scroll to the option that you prefer (Fax Forward or Print and Forward) appears, and then press Select.
- Enter the number that you want to forward the fax to, and then press Select.
Fwd now appears on the bottom left corner of the display.
Using Caller ID
Caller ID is a service provided by some telephone companies that identifies the phone number (and possibly the name) of the person who is calling you. If you subscribe to this service, it works with your All-In-One. When you receive a fax, the phone number of the person who sent you the fax appears on the display.
Note: Caller ID is available only in some countries and regions.
Using Junk Fax Blocking
Junk Fax Blocking helps you to regulate who you receive faxes from. You can use this feature in two different ways:
- Block Calls From: This option lets you create a list of phone numbers from which you do not want to receive faxes. Your All-In-One will not receive faxes from the numbers on this list.
- Only Accept Calls From: This option lets you create a list of phone numbers which you designate as the only numbers from which you want to receive faxes. Your All-In-One will only receive faxes from these numbers.
To choose the option that you prefer:
- On the control panel, press Fax.
- Press Options until Advanced Fax appears on the display.
- Press Options until Junk Fax Blocking appears on the display.
- Use the arrow buttons to scroll to Block Calls From or Only Accept Calls From, and then press Select.
Create a junk fax list:
- On the control panel, press Fax.
- Press Options until Advanced Fax appears.
- Press Options until Edit Junk Fax List appears.
- Use the right arrow button to scroll to Add, and then press Select.
- Enter a two-digit number, and then press Select.
- Enter a phone number, and then press Select.
- If you would like to add another phone number to the list, press 1. Or, if you are finished, press 2.
To customize your settings
Using the Fax Setup Utility
You can adjust the fax settings in the Fax Setup Utility. These settings apply to the faxes you send or receive.
- Click Start Programs Lexmark 4200 Series Fax Setup Utility.
- Click each tab and change the settings as desired.
- Click Close.
Note: You can also use the Fax Setup Utility to adjust some of the All-In-One fax settings. For more information, see Using the Fax Setup Utility.
Using the control panel
You can use the control panel to customize your fax jobs. Press Fax to enter Fax mode, and then press Options repeatedly to see each sub menu.
|
From this sub menu:
|
You can:
|
|
PENDING FAXES
|
Cancel any faxes that have not been sent.
|
|
PRINT REPORTS
|
Print:
- An activity report (the last 40 sent and received faxes)
- A send log
- A receive log
- A settings list (lists settings such as ringer volume)
|
|
NUMBER OF RINGS
|
Set the number of rings after which the All-In-One receives a fax if the Auto Answer mode is on:
- After 2 rings
- After 3 rings (default)
- After 5 rings
|
|
DELAY UNTIL
|
Enter a specific time to send a fax. For help, see To delay sending a broadcast fax.
Note: Make sure the date and time are entered correctly before you set a specific time to send a fax.
|
|
ON HOOK DIAL
|
Press Select to use On Hook Dial and dial the number when you hear a dial tone.
For more information, see On Hook Dial.
|
|
RINGER TONE
|
Choose a tone for incoming rings:
|
|
KEY PRESS TONE
|
Turn on or off the sound that is made when you press a control panel button. The options are:
|
|
SPEAKER VOLUME
|
Turn the All-In-One speaker volume (affects All-In-One fax sounds) to:
|
|
EDIT SPEED DIAL
|
Do these things to your speed dial list:
- Add to it
- Remove a number from it
- Modify it
- Print it
Note: For more information, see Setting up Speed Dial.
|
|
EDIT DATE/TIME
|
Edit the date and time.
Note: Make sure you enter a number into each of the available spaces. For example, 01:00 for 1:00.
|
|
PERSONALIZE FAX
|
Enter your name or the name of your business and your number. This information appears as a heading to identify you and your fax machine to the fax recipient.
|
|
BLANK PAPER SIZE
|
Choose:
- Letter (default)
- A4
- Legal
Note: If no asterisk (*) is present, a paper size that is not supported by fax has been selected through the copy menu.
|
|
BLANK PAPER TYPE
|
Specify the type of paper loaded in the paper support:
- Plain (default)
- Coated
- Photo
- Transparency
|
|
FAX FORWARD
|
- Turn this feature off (default).
- Enter a number to forward the fax to.
- Forward the fax and print it.
|
|
ADVANCED FAX
|
Press Select to see a menu of advanced fax options (see Advanced Fax options).
|
|
MAINTENANCE
|
- Check ink levels.
- Change cartridges.
- Align cartridges.
- Clean cartridges.
- Print a test page.
Note: Some links will not work while a job is in progress.
|
|
CLEAR SETTINGS
|
Select when you want your All-In-One to return to the default settings:
- After 2 min (default)
- Never
|
|
SET DEFAULTS
|
Set your default settings to:
Note: If you select Use Factory, you will be prompted to enter a language, country, date, and time.
|
|
LANGUAGE
|
Select your language.
|
Advanced Fax options
|
From this Advanced Fax option:
|
You can select:
|
|
REDIAL ATTEMPTS
|
The number of times you want the machine to try again if your fax does not go through:
- 0 times
- 1 time
- 2 times (default)
- 3 times
- 4 times
- 5 times
|
|
REDIAL INTERVAL
|
The time the machine waits before attempting a fax call again:
- 1 min
- 2 min
- 3 min (default)
- 4 min
- 5 min
- 6 min
- 7 min
- 8 min
|
|
FAX CONFIRMATION
|
- Off (no status page is printed)
- Print for all (prints a status report after each fax you send including jobs that have errors).
- Print for errors (prints a status report only after jobs that did not send). (default)
|
|
ACTIVITY REPORT
|
- On request (you can ask for the report to print). (default)
- After 40 faxes (report is automatically generated after 40 faxes print).
- At specific time (report is automatically generated at the time you specify).
|
|
FIT FAX TO PAGE
|
- Try to fit (default)
- Two pages
|
|
FAX FOOTER
|
- On (if you want the machine to insert the time, date, page number, and caller ID number at the bottom of each incoming fax). (default)
- Off
|
|
DIALING METHOD
|
|
|
DISTINCTIVE RING
|
- Off (default)
- Distinctive Ring 1 (double)
- Distinctive Ring 2 (triple)
Note: You can choose distinctive rings if they are available from your local telephone service.
|
|
DIAL PREFIX
|
- None (default)
- Create - you can create an up to eight- character prefix to be added to the beginning of each number dialed.
|
|
ANSWER PREFIX
|
- None (default)
- Create - you can create an up to eight- character prefix to be transmitted prior to responding to fax tones. This lets the answering machine disable or enable special calling features delivered by the telephone service.
|
|
SCAN BEFORE DIAL
|
|
|
MAX SEND SPEED
|
A bps speed:
- 33,600 (default)
- 31,200
- 28,800
- 26,400
- 24,000
- 21,600
- 19,200
- 16,800
- 14,400
- 12,000
- 9,600
- 7,200
- 4,800
- 2,400
|
|
ERROR CORRECTION
|
Note: Usually, error correction should be on. However, if you are having trouble sending an overseas fax, for example, turn error correction off.
|
|
LANGUAGE
|
Your language
|
|
COUNTRY CODE
|
Your country code
|
|
CALL DIAGNOSTICS
|
- Off- keeps the speaker off during fax transmission.
- Audio on- keeps the speaker on during fax transmission.
- Print T30 signals report
- Both audio and report
|
|
JUNK FAX BLOCKING
|
|
|
BLOCK "NO ID" CALLS
|
|
|
EDIT JUNK FAX LIST
|
|
|
From this Advanced Fax option:
|
You can select:
|
|
COUNTRY CODE
|
- Argentina
- Australia
- Austria
- Bangladesh
- Barbados
- Belarus
- Belgium
- Bolivia
- Brazil
- Bulgaria
- Canada
- Chile
- Columbia
- Costa Rica
- Croatia
- Cyprus
- Czech Republic
- Denmark
- Ecuador
- Egypt
- Estonia
- Europe
- Finland
- France
- Germany
- Greece
- Guam
- Guatemala
- Hong Kong
- Hungary
- Iceland
- India
- Indonesia
- Ireland
- Israel
- Italy
- Japan
- Korea
|
|
|
COUNTRY CODE
|
- Thailand
- Turkey
- UAE
- UK
- Ukraine
- Uruguay
|
- USA/North American
- Venezuela
- Vietnam
- Virgin Islands
|
Note: The option currently selected is noted with an asterisk (*) on the display.