トナーカートリッジを交換する
前面ドアを開きます。
使用済みトナーカートリッジを取り外します。
新しいトナーカートリッジを包装から取り出します。
新しいトナーカートリッジを挿入し、カチッと音がすることを確認します。
ドアを閉じます。
前面ドアを開きます。
使用済みトナーカートリッジを取り外します。
新しいトナーカートリッジを包装から取り出します。
新しいトナーカートリッジを挿入し、カチッと音がすることを確認します。
ドアを閉じます。
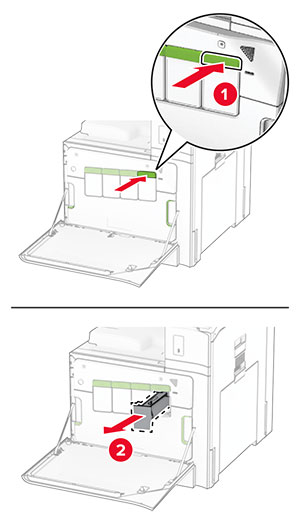
前面ドアを開きます。
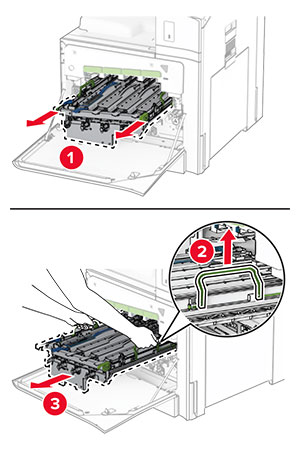
トナーカートリッジを取り外します。
廃トナーボトルを取り外します。
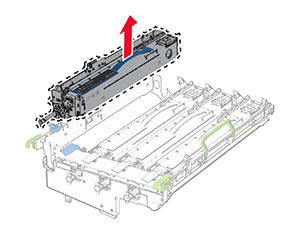
イメージングキットを取り外します。
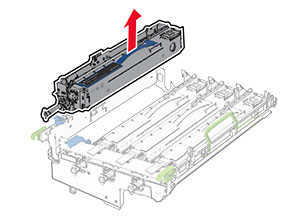
使用済みのブラックイメージングユニットのロックを解除します。
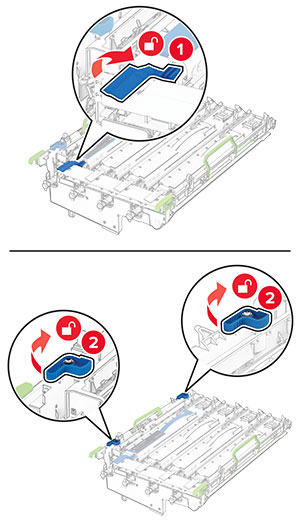
使用済みのブラックイメージングユニットを取り外します。
新しいブラックイメージングユニットの梱包を取り外します。
新しいブラックイメージングユニットを挿入します。
新しいブラックイメージングユニットをロックします。

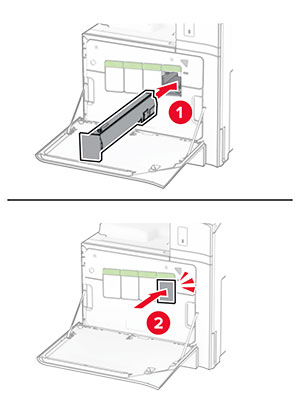
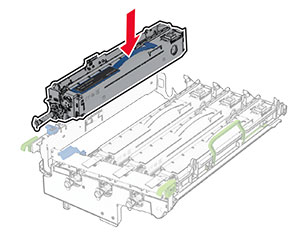
イメージングキットがしっかりと装着されるまで挿入します。
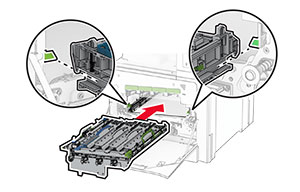
廃トナーボトルを挿入し、カチッと音がすることを確認します。

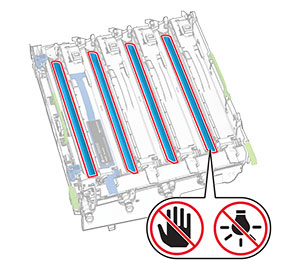
プリントヘッドワイパーをゆっくりと引き出し、プリントヘッドレンズを清掃します。
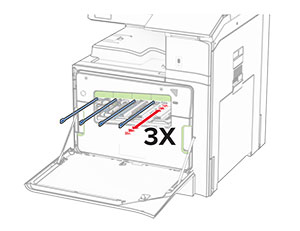
プリントヘッドレンズの清掃の詳細については、プリントヘッドレンズの清掃を参照してください。
トナーカートリッジを挿入します。

ドアを閉じます。
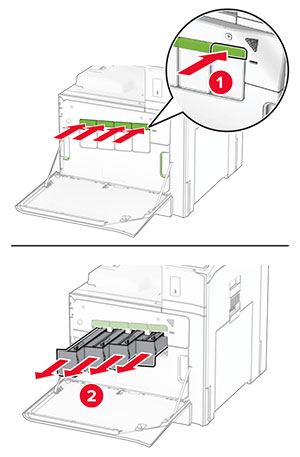
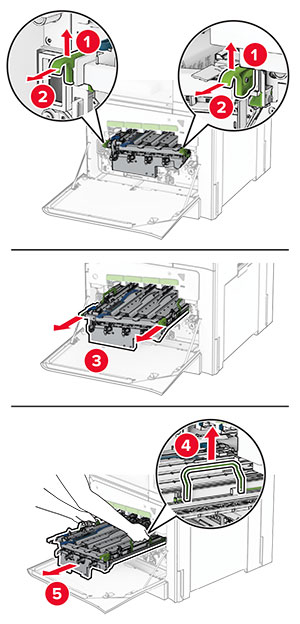
前面ドアを開きます。
トナーカートリッジを取り外します。
廃トナーボトルを取り外します。
使用済みイメージングキットを取り外します。
ブラックイメージングユニットのロックを解除します。
ブラックイメージングユニットを取り外します。
新しいイメージングキットを包装から取り出します。
ブラックイメージングユニットを新しいイメージングキットに挿入します。
ブラックイメージングユニットをロックします。
新しいイメージングキットを挿入し、しっかりと装着します。
廃トナーボトルを挿入し、カチッと音がすることを確認します。
プリントヘッドワイパーをゆっくりと引き出し、プリントヘッドレンズを清掃します。
プリントヘッドレンズの清掃の詳細については、プリントヘッドレンズの清掃を参照してください。
トナーカートリッジを挿入します。
ドアを閉じます。
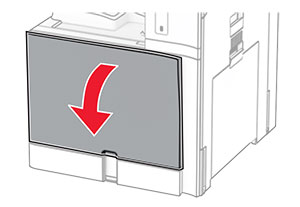
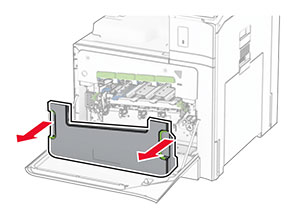
前面ドアを開きます。
使用済の廃トナーボトルを取り外します。
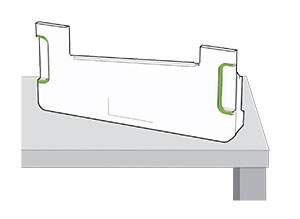
新しい廃トナーボトルの梱包を取り外します。
廃トナー転送ボックスを挿入し、カチッと音がすることを確認してから、ドアを閉じます。
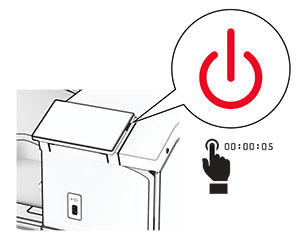
プリンタの電源を切ります。
電源コードをコンセントから抜き、次にプリンタから抜きます。
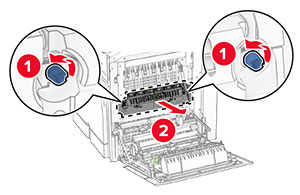
ドア B を開きます。
 注意—表面高温: プリンタの内部が高温になっている場合があります。高温のコンポーネントによる負傷の危険を減らすために、コンポーネントの表面が冷えるのを待ってから触れてください。
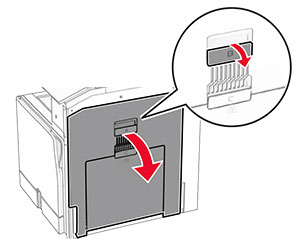
使用済みのフューザーのロックを解除してから、取り外します。
新しいフューザーを梱包から取り出します。
新しいフューザーを挿入して、カチッと音がすることを確認してから、ロックします。
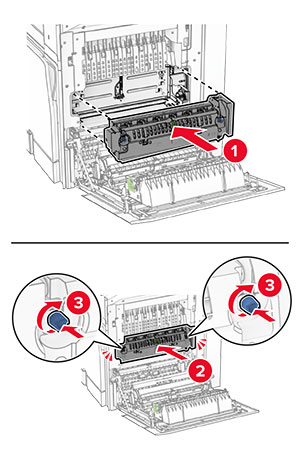
ドア B を閉じます。
電源コードの一方の端をプリンタに接続してから、もう一方の端をコンセントに差し込みます。
 注意—傷害の恐れあり: 火災や感電の危険を避けるため、電源コードを接続するコンセントが、製品の設置場所の近くにあること、アクセスしやすいこと、正しく接地されていること、適切な定格であることを確認してください。
プリンタの電源を入れます。
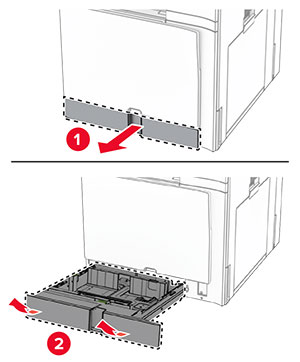
トレイを引き出します。
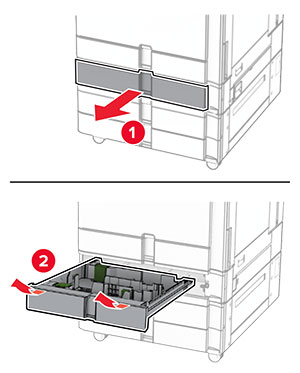
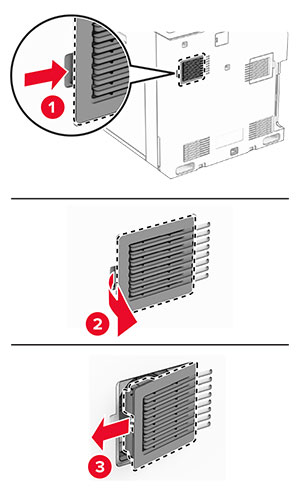
使用済みのサイズガイドを取り外します。
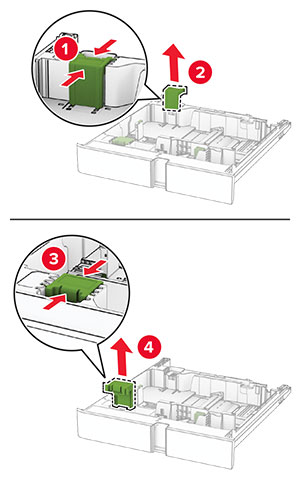
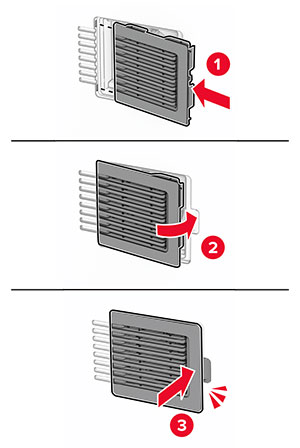
新しいサイズガイドを梱包から取り出します。
新しいサイズガイドを挿入し、カチッと音がすることを確認します。

トレイを挿入します。
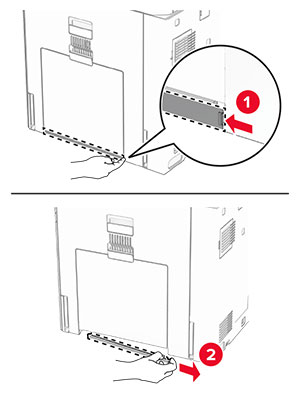
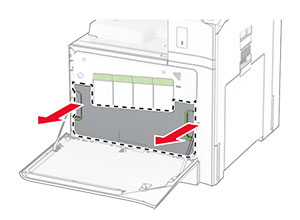
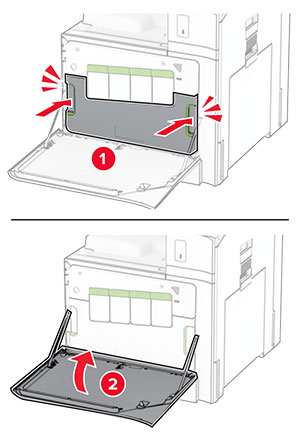
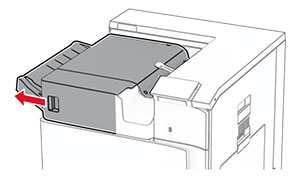
使用済みの上部排紙トレイ拡張機能を取り外します。
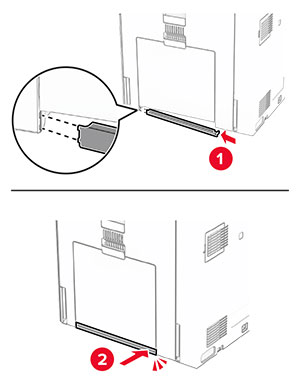
新しいアクセス上部排紙トレイ拡張機能を梱包から取り出します。
新しい上部排紙トレイ拡張機能を挿入します。
フィニッシャのドアを開きます。
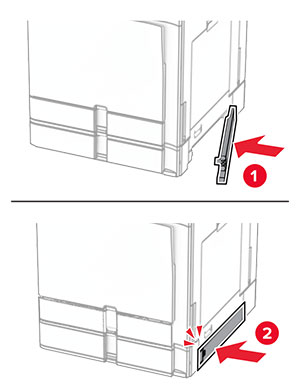
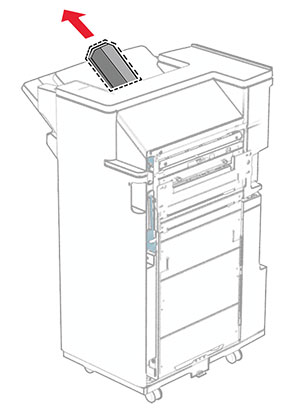
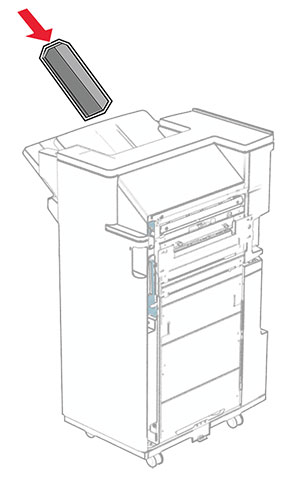
使用済みのホールパンチボックスを取り外します。
新しい穴パンチボックスを取り出します。
新しい穴パンチボックスを挿入します。
フィニッシャのドアを閉じます。
標準排紙トレイを取り外します。

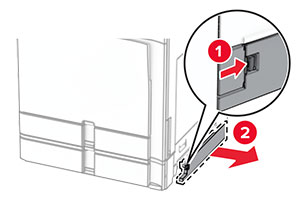
使用済みの用紙搬送ユニットのコネクタカバーを取り外します。
新しいコネクタカバーを梱包から取り出します。
新しいコネクタカバーを取り付け、カチッと音がすることを確認します。
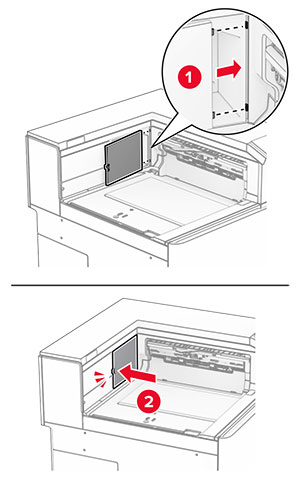
標準排紙トレイを取り付けます。

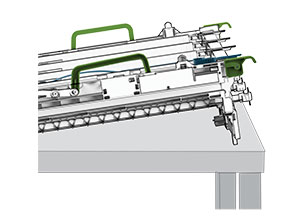
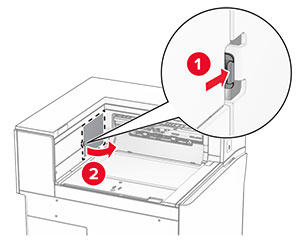
ハンドル F をつかんで、ホチキスフィニッシャを左にスライドします。
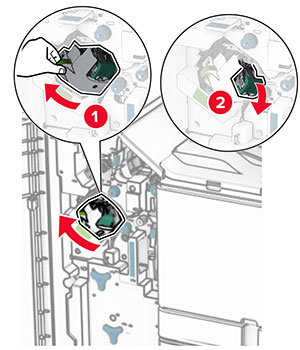
ホチキスカートリッジホルダーを取り外します。
空のホチキスカートリッジを取り外します。
新しいホチキスカートリッジを、所定の位置でカチッという音がするまで挿入します。
カチッと音がするまで、ホチキスカートリッジホルダーを挿入します。
ホチキスフィニッシャを右にスライドします。
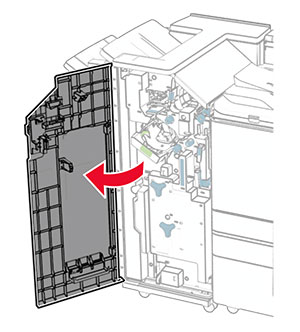
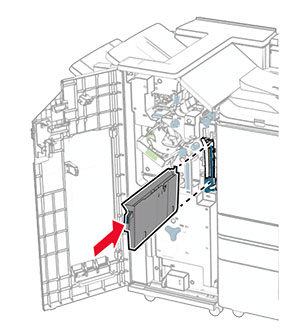
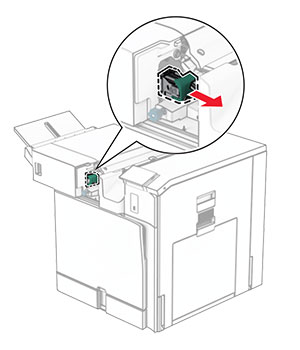
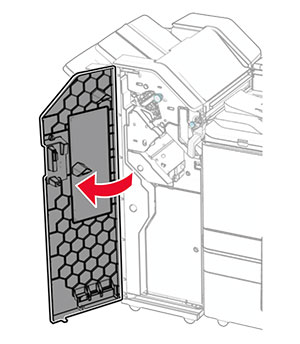
ドア H を開きます。
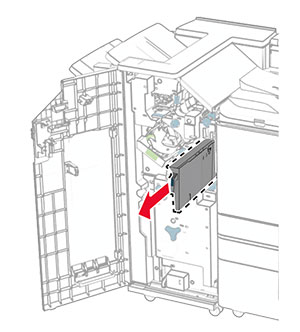
緑色のハンドルを引き抜き、ホチキスカートリッジホルダーを取り外します。
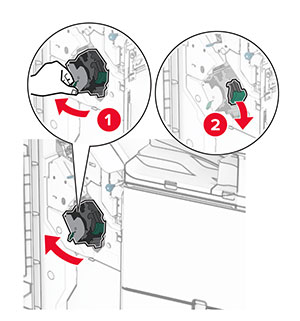
空のホチキスカートリッジを取り外します。
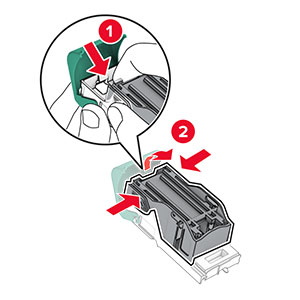
新しいホチキスカートリッジを包装から取り出します。
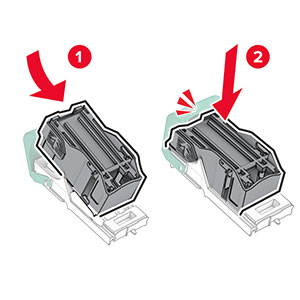
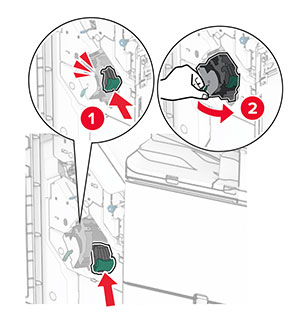
新しいホチキスカートリッジを、所定の位置でカチッという音がするまで挿入します。
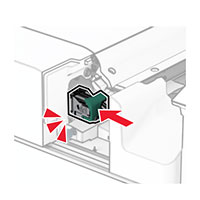
カチッと音がするまで、ホチキスカートリッジホルダーを挿入します。
ドア H を閉じます。
ドア H を開きます。
緑色のハンドルを引き抜き、ホチキスカートリッジホルダーを取り外します。
空のホチキスカートリッジを取り外します。
新しいホチキスカートリッジを包装から取り出します。
新しいホチキスカートリッジを、所定の位置でカチッという音がするまで挿入します。
カチッと音がするまで、ホチキスカートリッジホルダーを挿入します。
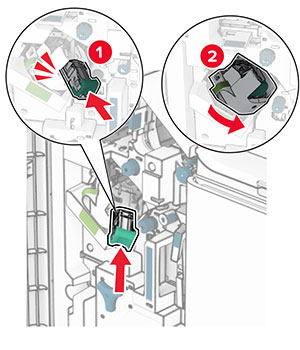
ドア H を閉じます。
フィニッシャのドアを開きます。
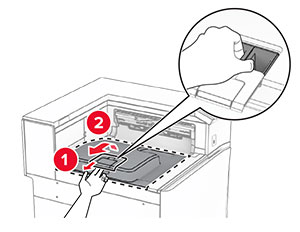
冊子メーカーを引き出し、使用済みホチキスカートリッジホルダーを取り外します。
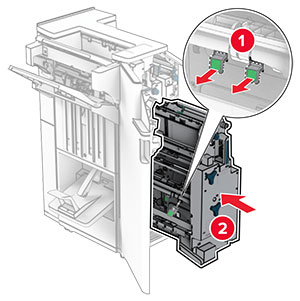
新しいホチキスカートリッジを梱包から取り出します。
新しいホチキスカートリッジホルダーを挿入します。
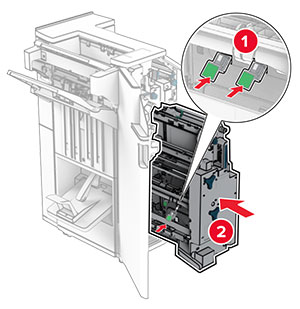
冊子メーカーを挿入し、フィニッシャのドアを閉じます。
操作パネルで、[設定] > [デバイス] > [メンテナンス] > [設定メニュー] > [消耗品使用量とカウンタ]の順に移動します。
リセットするカウンタを選択します。