更換碳粉匣
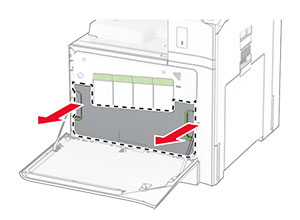
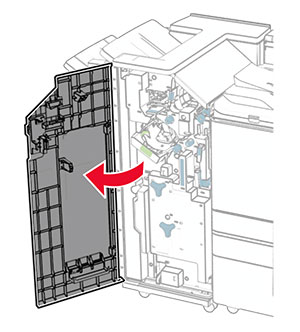
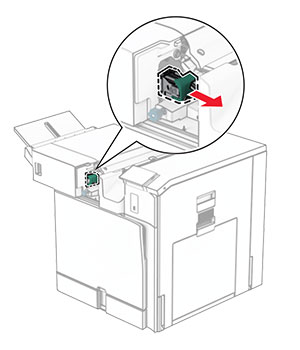
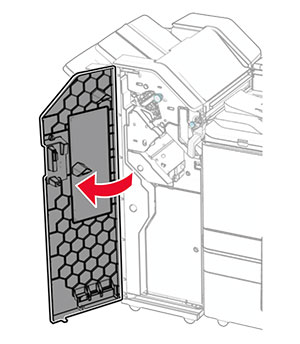
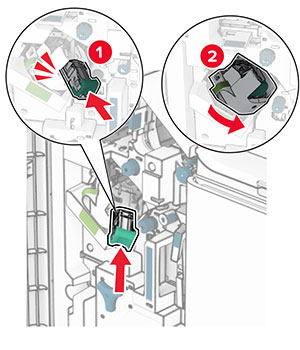
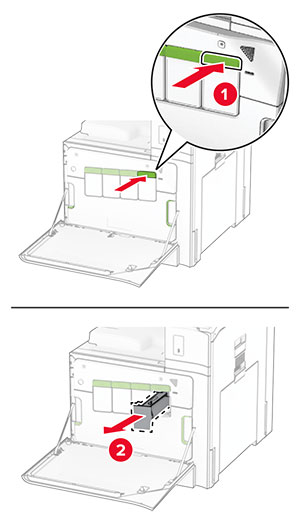
打開前門。
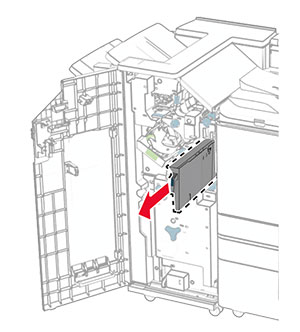
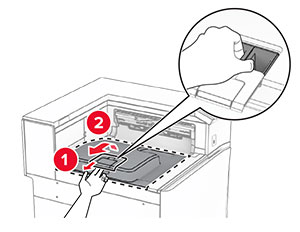
取出使用過的碳粉匣。
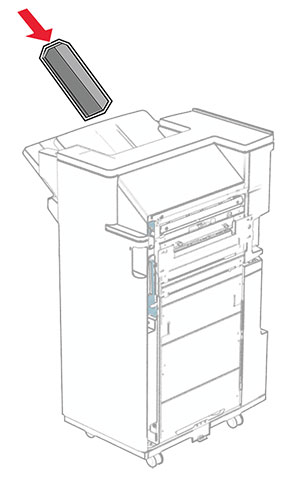
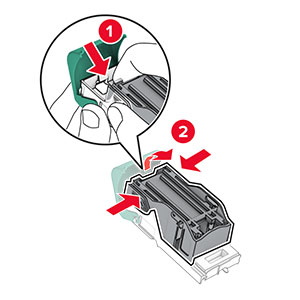
拆開新碳粉匣的包裝。
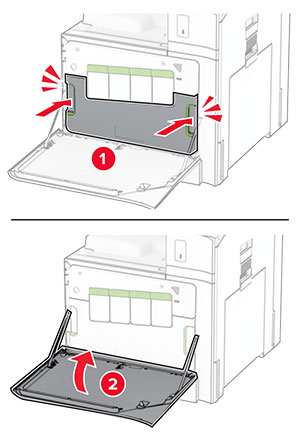
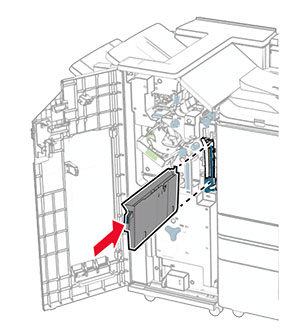
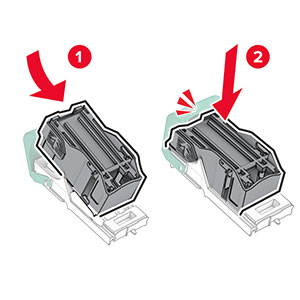
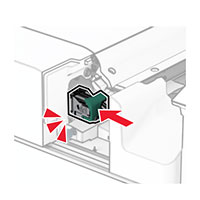
插入新的碳粉匣,直到其卡入定位。
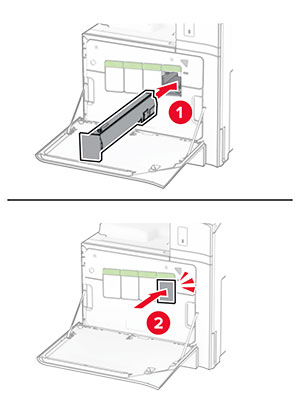
關上門。
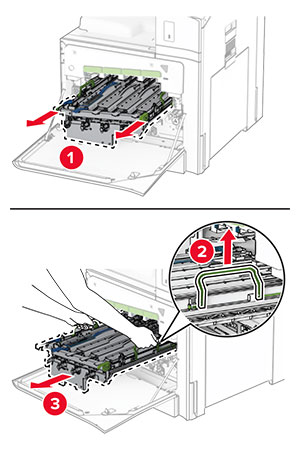
打開前門。
取出碳粉匣。
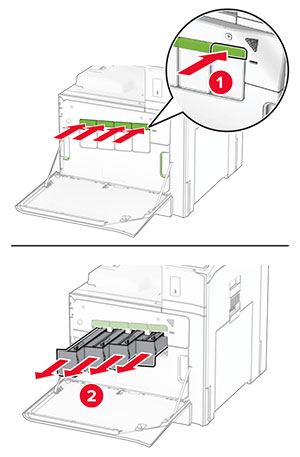
取出廢棄碳粉回收瓶。
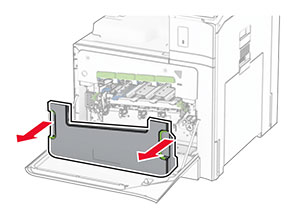
移除成像套件。
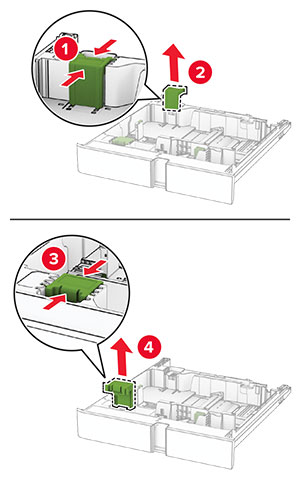
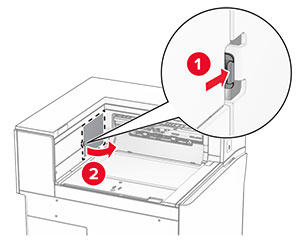
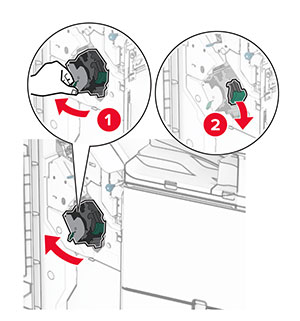
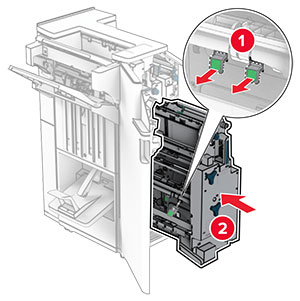
解鎖使用過的黑色成像組件。
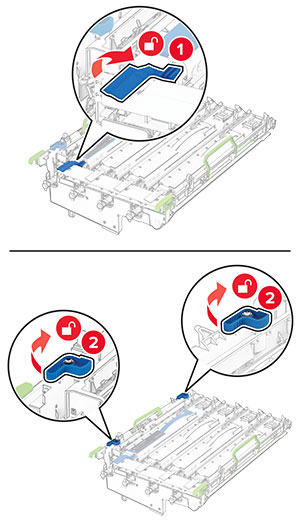
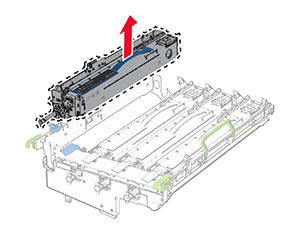
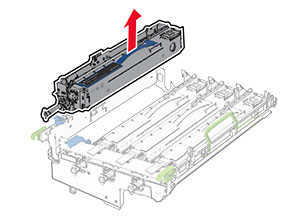
卸下使用過的黑色成像組件。
拆開全新黑色成像組件的包裝。
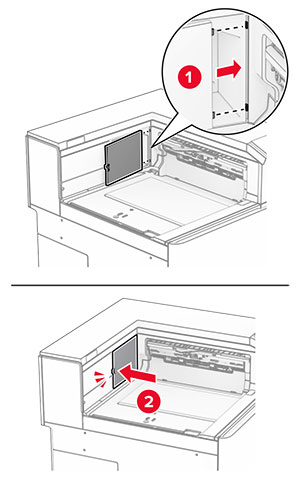
插入全新黑色成像組件的包裝。
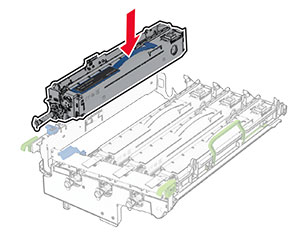
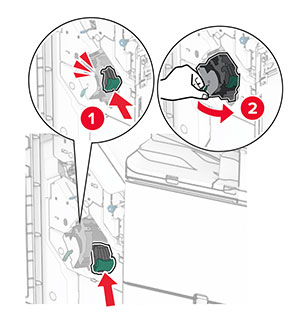
將全新黑色成像組件鎖入定位。

插入成像套件,直到其完全插入。
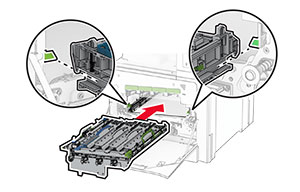
插入廢棄碳粉回收瓶,直到其卡入定位。

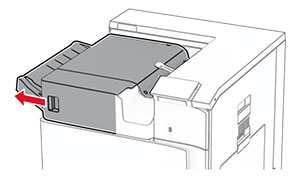
輕輕拉出列印頭刷,然後清潔列印頭鏡片。
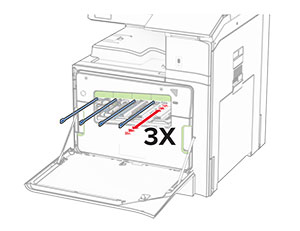
如需清潔列印頭鏡片的相關資訊,請參閱清潔列印頭鏡片。
插入碳粉匣。

關上門。
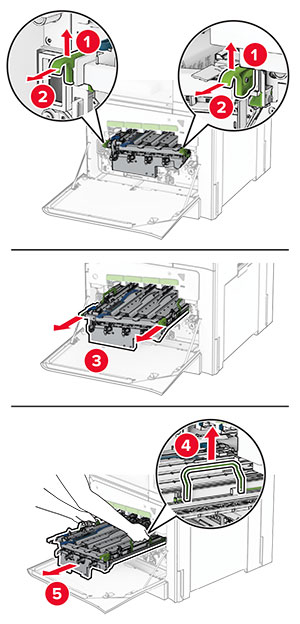
打開前門。
取出碳粉匣。
取出廢棄碳粉回收瓶。
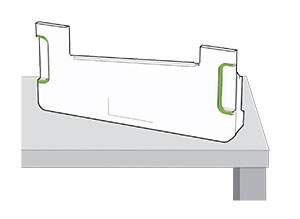
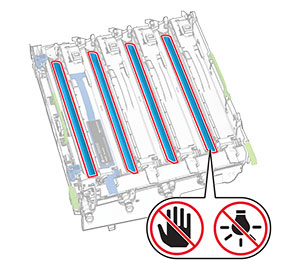
移除使用過的成像套件。
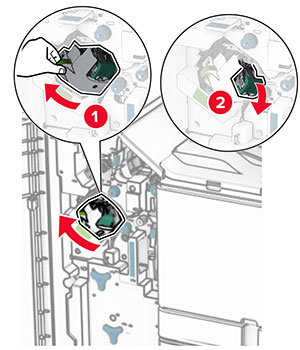
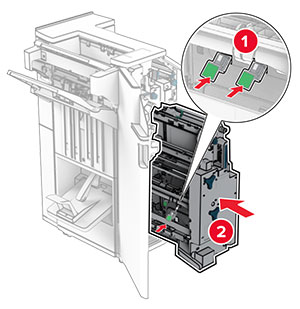
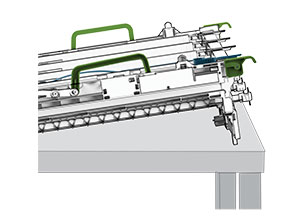
解鎖黑色成像組件。
卸下黑色成像組件。
拆開全新成像套件的包裝。
將黑色成像組件插入新的成像套件。
將黑色成像組件鎖入定位。
插入新的像套件,直到其完全插入。
插入廢棄碳粉回收瓶,直到其卡入定位。
輕輕拉出列印頭刷,然後清潔列印頭鏡片。
如需清潔列印頭鏡片的相關資訊,請參閱清潔列印頭鏡片。
插入碳粉匣。
關上門。
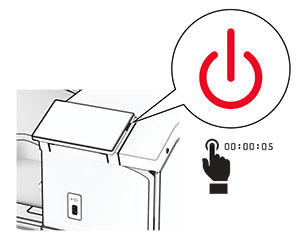
關閉印表機電源。
從電源插座拔除電源線,然後再從印表機拔除。
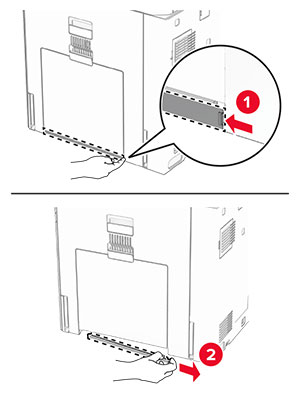
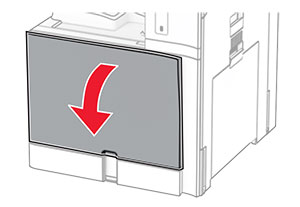
打開 B 門。
 請當心—表面高溫: 印表機內部的溫度可能很高。為降低高溫組件導致受傷的風險,請先讓表面冷卻再碰觸。
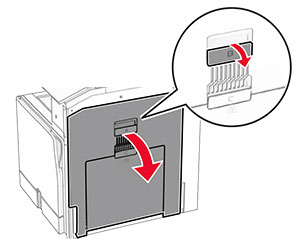
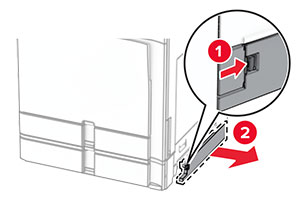
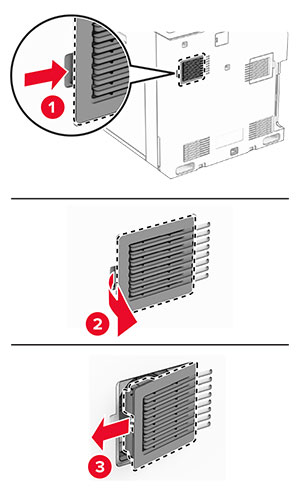
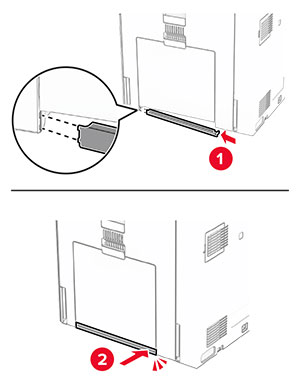
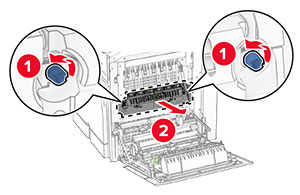
解鎖然後卸下用過的加熱熔合組件,。
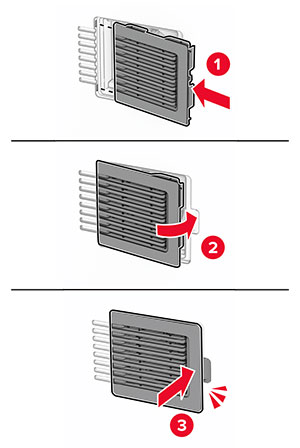
拆開新加熱熔合組件的包裝。
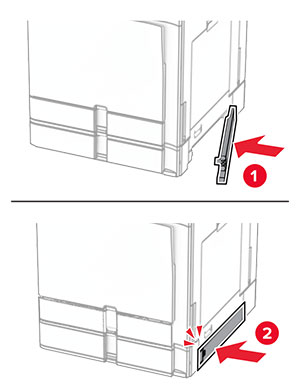
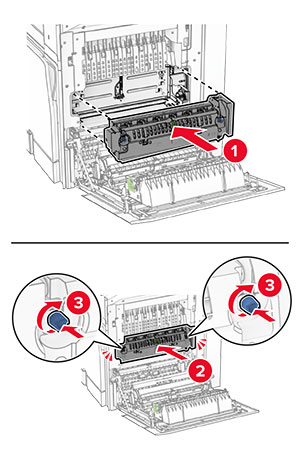
插入新的加熱熔合組件,直到其卡入定位,然後鎖定它。
關上 B 門。
將電源線的一端連接到印表機,然後將另一端連接到電源插座。
 請當心—潛在受傷危險性: 為避免發生火災或觸電的危險,請將電源線連接至產品附近額定電壓相符且正確接地的電源插座,以便於使用。
開啟印表機電源。