Understanding the Agents tab
The Agents tab of the Fleet Management portal lets you manage the agents that you use to discover and enroll printers in Lexmark Cloud Services.
The Agents tab has three sections.
Printer Agents—Use this section to manage the Printer Agents that run on your printers.
Fleet Agents—Use this section to manage the Fleet Agents that run on a server or host computer.
Native Agents—Use this section to manage the Native Agents.
Local Agents—Use this section to manage the Local Agents.
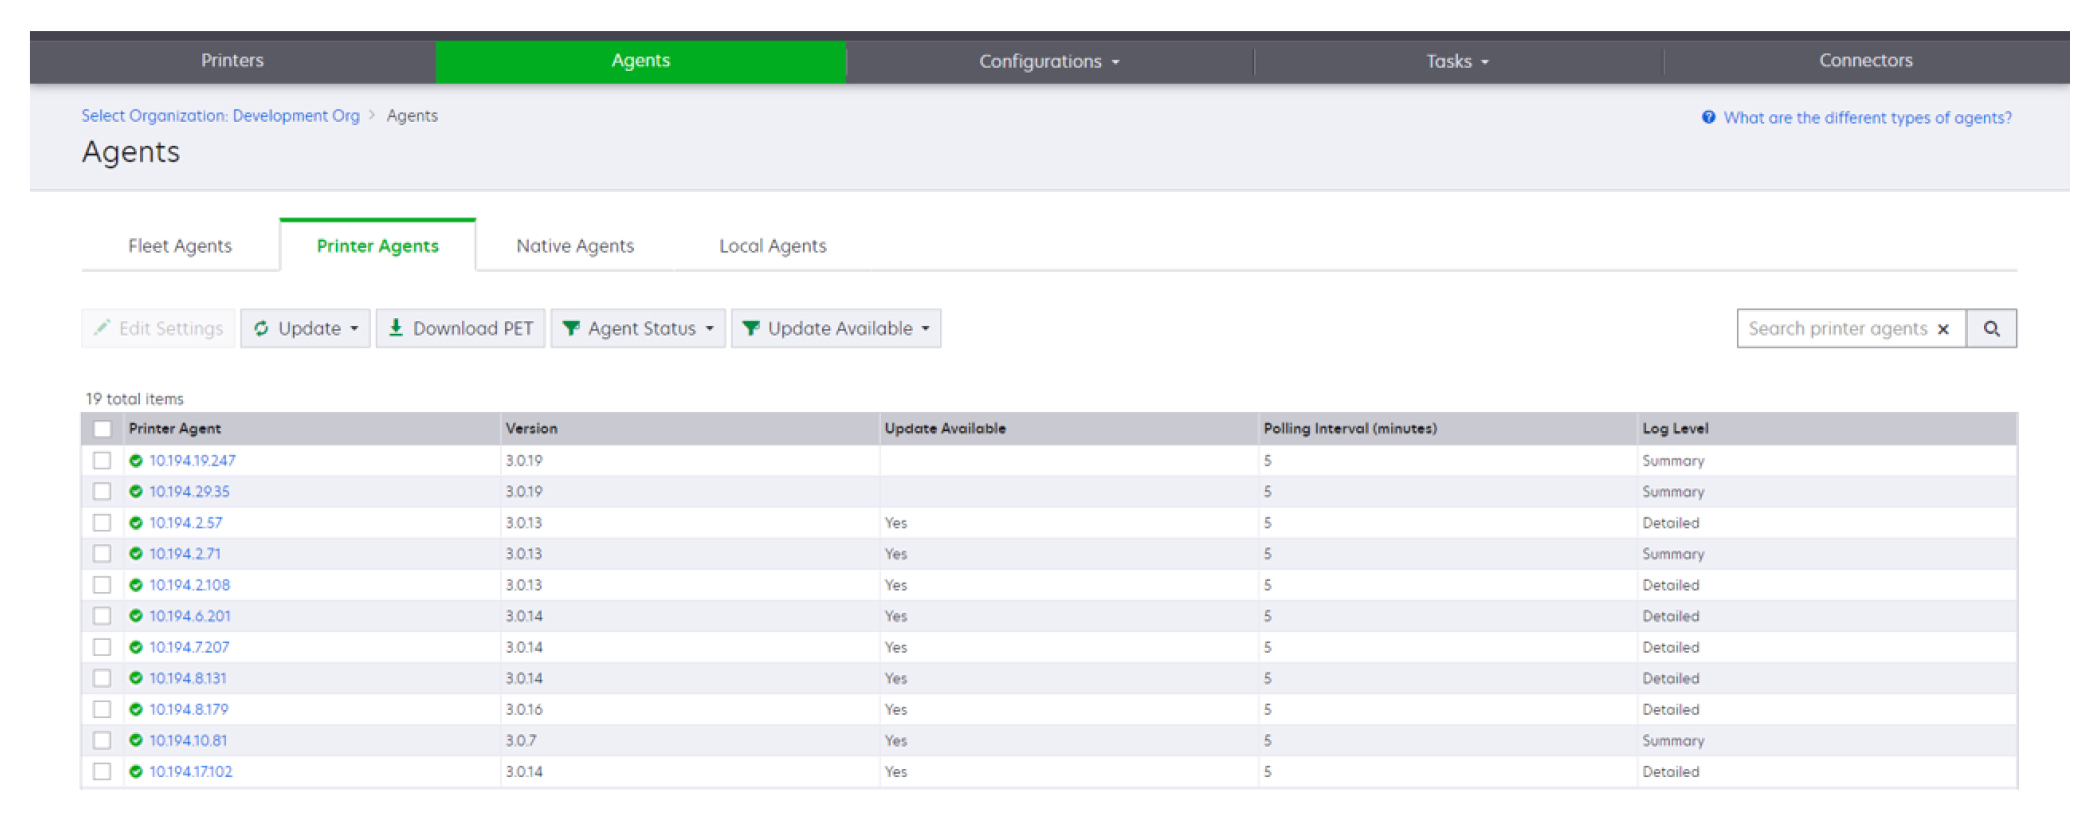
Managing the Printer Agents section
From the Fleet Management web portal, select an organization.
Click Agents > Printer Agents.
Do one or more of the following:
To edit the agent settings, select an agent, and then click Edit Settings.
To update the Printer Agent, select an agent, and then click Update > Update agent version.
Note: We recommend updating the Printer Agent to the current version to support all Cloud Fleet Management features.
To update the printer administrator credentials for the agent, select an agent, and then click Update > Update agent access credentials.
Notes:
To download the Printer Enrollment Tool, click Download PET.
To view printer agents with a specific status, click Agent Status, and then select a status filter.
To view printer agents that require version update, click Update Available > Yes.
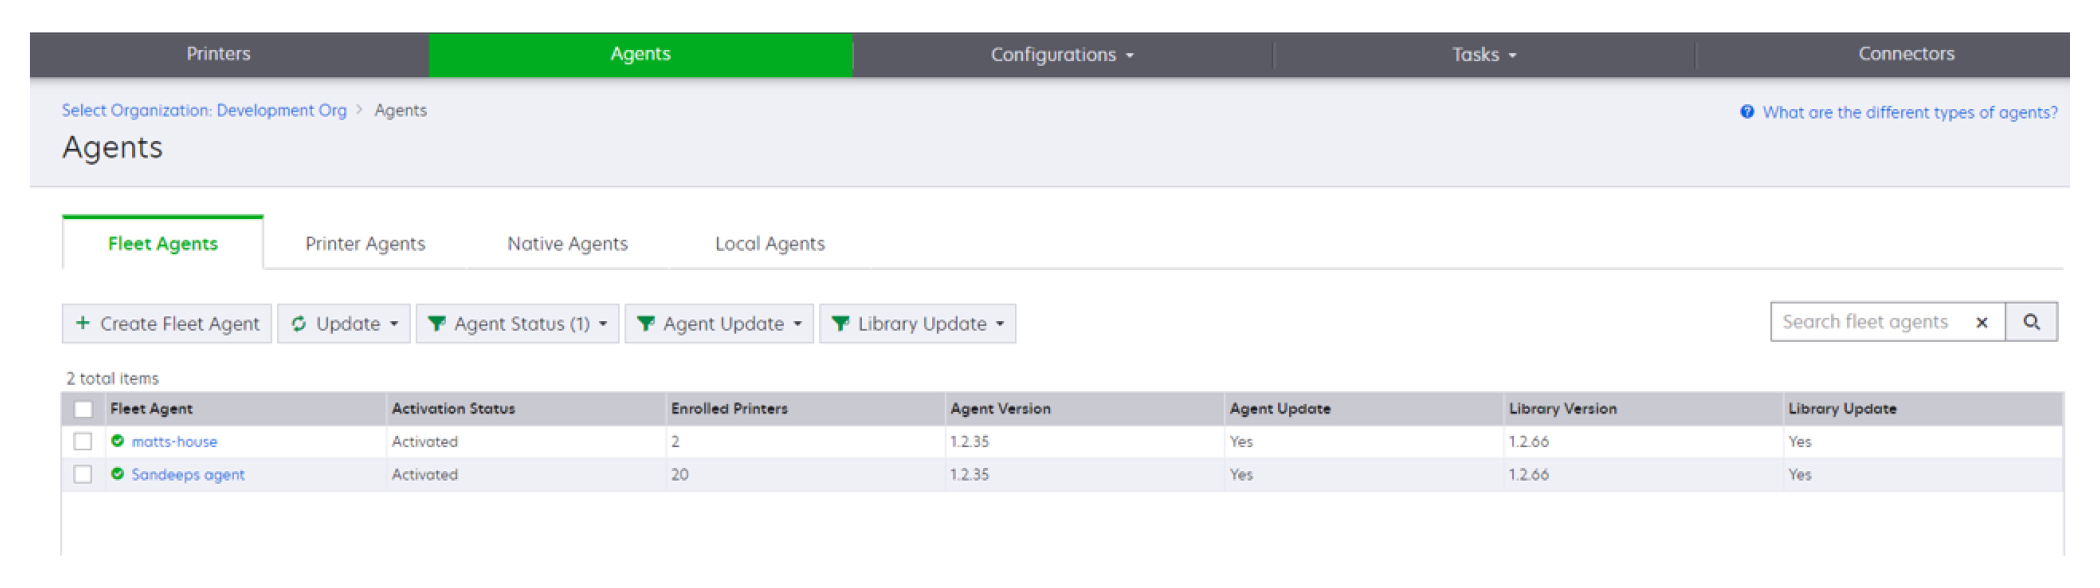
Managing the Fleet Agents section
From the Fleet Management web portal, select an organization.
Click Agents > Fleet Agents.
Do one or more of the following:
To create another Fleet Agent, click Create Fleet Agent.
To change the settings of a Fleet Agent, click the name of the Fleet Agent.
To update the Fleet Agent in your server, select a Fleet Agent, and then click Update > Fleet Agent.
To update the Fleet Agent with the latest supported printers, select a Fleet Agent, and then click Update > Printer support library.
To view Fleet Agents with a specific status, click Agent Status, and then select a status filter.
To view Fleet Agents that require update, click Agent Update > Yes.
To view Fleet Agents that require supported printers library update, click Library Update > Yes.
Managing the Native Agents section
From the Fleet Management web portal, click Agents > Native Agents.
Do one or more of the following:
To enroll a supported printer with a printer-generated enrollment code, click Enrollment > Enroll Printer, and then type the enrollment code.
To pre-enroll a supported printer, click Enrollment > Pre-enroll > Pre-enroll printers.
To view the enrollment code, click Enrollment > Pre-enroll.
Note: Lexmark Cloud Services assigns one pre-enrollment code for your fleet.
To update the printer administrator credentials, select a printer, and then click Update Access Credentials.
To view Native Agents with a specific status, click Agent Status, and then select a status filter.
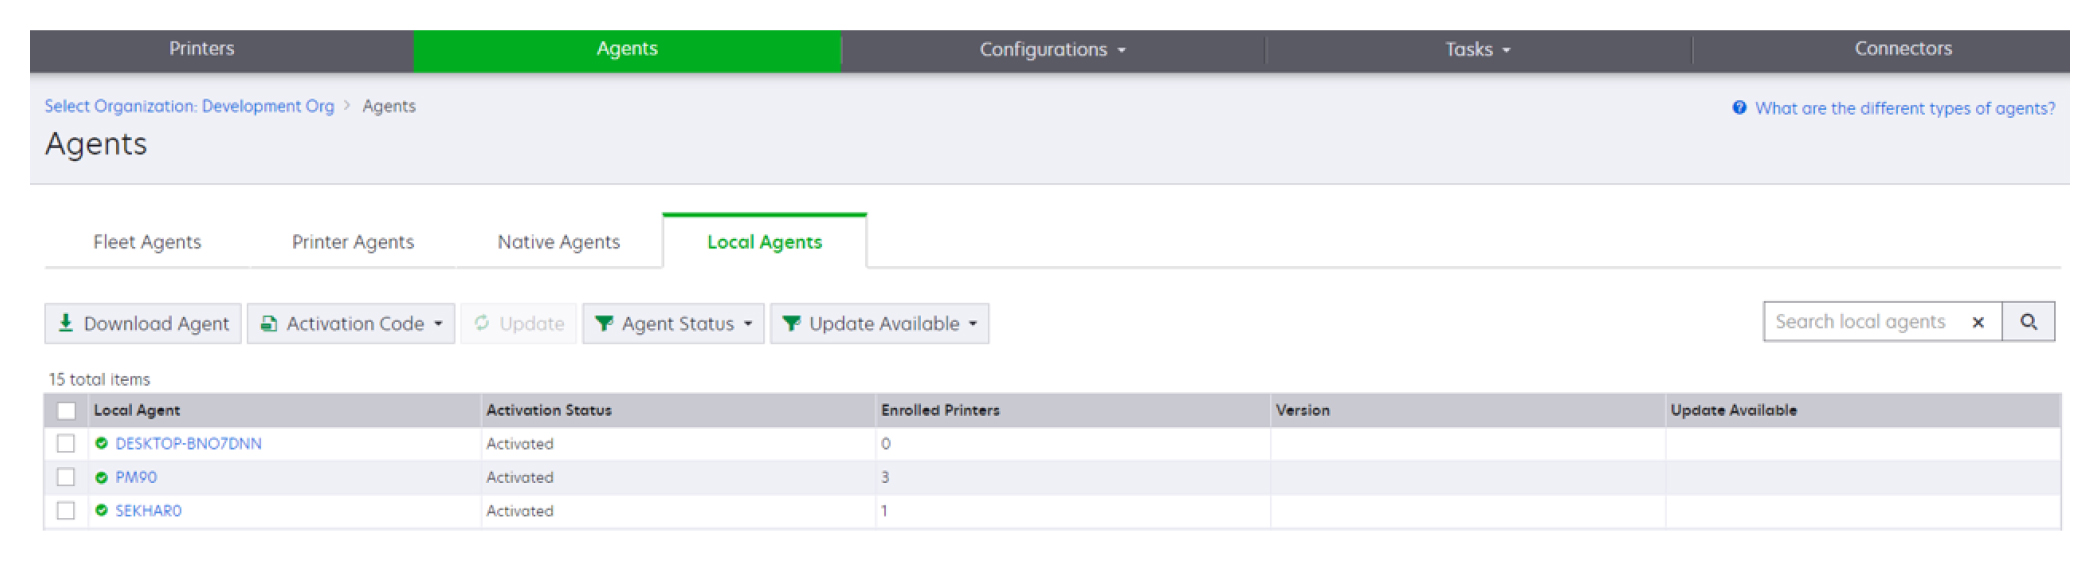
Managing the Local Agents section
From the Fleet Management web portal, click Agents > Local Agents.
Do one or more of the following:
Note: If no local agent is listed, then download, install, and activate it.
To view the activation code, click Activation Code > Generate activation code.
Note: You can set the number of agents that can be code-activated.
To filter local agents based on their status, click Agent Status, and then select a status.
To identify local agents that have available updates, click Updates Available > Yes.
To update a local agent, select the agent, and click Update.