With a document open, choose File ![]() Print.
Print.
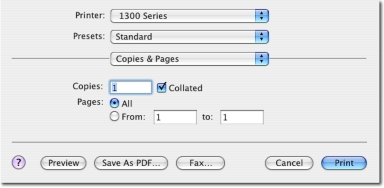
The Print dialog appears.
For Mac OS X version 10.3:
For Mac OS X version 10.4 or later:

From the Printer pop-up menu, choose 1300 Series.
Change the settings as needed.
From here | Choose | To |
Copies & Pages | Copies | Specify the number of copies you want to print. |
Collated | Sort multiple copy jobs. | |
Pages |
| |
Layout | Pages per Sheet | Print multiple pages on a single sheet of paper. |
Layout Direction | Specify the arrangement of multiple pages on a single sheet. | |
Border | Print a border around each page. | |
Output Options | Save the print job as a file. Note: Format is activated when the Save as File option is selected. | |
Scheduler | Print Document | Schedule a print job. You can choose to print a file immediately, put it on hold, or specify a time for the printer to print. |
Priority | Specify a priority for printing. | |
Paper Handling | Page Order | Choose any of these options:
|
Choose any of these print options:
| ||
Destination Paper Size | Choose any of these options:
Note: Scale down is activated only when the “Scale to fit paper size” option is selected. | |
ColorSync | Color Conversion | Select Standard. |
Quartz Filter | Choose a filtering option. | |
Color Options | Document Color | Choose a color setting. Choose Color or Black Only. |
Cover Page | Printer Cover Page | Choose any of these options:
|
Cover Page Type | Choose any of these options:
| |
Billing Info | Enter billing information. | |
Quality & Media | Paper Type | Specify the type of paper loaded. |
Print Quality | Choose a print quality. | |
Printer Services | Lexmark 1300 Series Utility | Go to the Utility. |
Troubleshooting | Open the Help Center. | |
Order Supplies | Visit our Web site to order printer supplies. | |
Contact Lexmark | Visit our Web site. | |
Software Version | View the software version on installed files. | |
Preview | Rotate | Choose the orientation of the photo. |
Quartz Filter | Choose any of these options:
| |
Advanced Options | Mirror | Print the document as a mirror image. |
Automatic Image Sharpening | Reduce image blurring. | |
Summary | View a summary of the current print settings. | |