Using the Lexmark Imaging Studio
Using the All-In-One Center
Using Lexmark Fast Pics
Using Lexmark Photo Editor
Using Print Properties
Using the Lexmark Solution Center
The All-In-One software includes these components:
- Lexmark Imaging Studio (for quick access to each task)
- Lexmark All-In-One Center (for managing tasks and print options)
- Lexmark Fast Pics (for quick digital photo selection and printing)
- Lexmark Photo Editor (for improving photo size, composition, and quality)
- Print Properties (for changing printer settings)
- Lexmark Solution Center (for troubleshooting, maintenance, and cartridge ordering information)
Note: To use any of this software, your All-In-One must be connected to a computer.
Using the Lexmark Imaging Studio
There are several ways to open the Lexmark Imaging Studio:
Note: The Lexmark Imaging Studio icon, as with other program icons in Windows can be added to the desktop. Do so by dragging it from the Start  Programs Lexmark 3300 Series Lexmark Imaging Studio menu.
The Lexmark Imaging Studio appears.
Using the Lexmark Imaging Studio task buttons
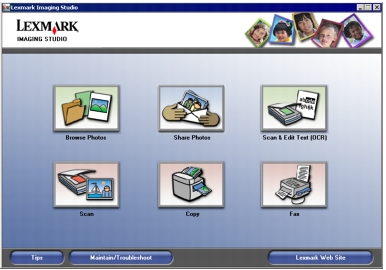
These buttons can be used to go directly to the Lexmark All-In-One Center.
|
Click
|
To
|
Details
|
|

|
Browse photos
|
This opens the Lexmark All-In-One Center to the Saved Images tab so you can locate and select photos to reorganize or print. If you want to print them, select the photo(s) and click Next to open the Fast Pics program. You can also select from a Creative Tasks list. For more information, see Finding and printing your photos.
|
|

|
Share photos
|
This opens a small dialog box where you select whether you want to Scan and e-mail a photo, or Find and e-mail a saved photo. If you select Scan and e-mail a photo, the Lexmark All-In-One Center opens to the Scanning & Copying tab at the E-mail an image feature.
- Select options for scanning the image.
- Click Next. This starts the scan.
- Click Attach to attach it to a new e-mail message.
If you select Find and e-mail a saved photo, you can e-mail saved images from your computer. This opens the Lexmark All-In-One Center to the Saved Images tab at the E-mail an image feature.
- Select your photos on the left.
- Adjust the size of the photos if necessary.
- Click Attach Now to create a new e-mail message with your images attached. For more information, see E-mailing a scanned image or document.
|
|

|
Scan & edit text (OCR)
|
This opens the Lexmark All-In-One Center to the Scanning & Copying tab where you can scan text to a text editing program. For more information, see Editing scanned text using Optical Character Recognition (OCR).
|
|

|
Scan
|
This opens the Lexmark All-in-One Center to the Scanning & Copying tab where you can scan photos or documents so they can be stored on your computer. For more information, see Scanning an item.
|
|

|
Copy
|
This opens the Lexmark All-In-One Center to the Scanning & Copying tab where you can make a copy of your photos or documents. For more information, see Copying photos.
|
|

|
Fax
|
This a small dialog box where you select whether you want to Scan and send a fax, or Receive a fax or view settings/history. The first choice takes you to the Lexmark All-In-One Center to the Scanning & Copying tab so you can select Fax using PC modem from the list of Creative Tasks. The second choice takes you to the fax software. For more information, see Faxing.
|
|
Click
|
To
|
|
|
Find out more about what you can do with the software.
|
|
|
Use the tools in the Lexmark Solution Center to keep your printer working optimally. For more information, see Using the Lexmark Solution Center.
|
|
|
Visit the Lexmark Web site.
|
Using the All-In-One Center
Scanning & Copying tab
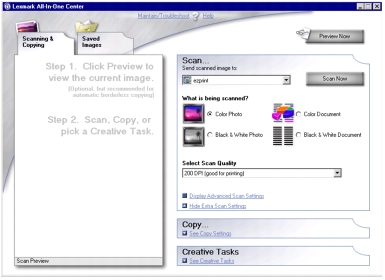
The Lexmark All-In-One Center, when first opened, has two tabs on the left. It opens on one of the tabs according to the way you have opened it. There are four main functions on the right of the Scanning & Copying tab: Preview, Scan, Copy, and Creative Tasks.
|
From
|
You can
|
|
Preview
|
- Select a region of the preview image to scan.
- View an image of what will be printed or copied.
|
|
Scan
|
Note: Click See More Scan Settings to view all settings.
- Select what type of image is being scanned.
- Select a scan quality for how the scan will be used.
- Select to Display Advanced Scan Settings.
|
|
Copy
|
- Select the quantity and color of the copies.
- Click Copy Now to begin copying.
- Click See More Copy Settings to view all settings.
- Select a paper size.
- Select a quality setting for the copies.
- Adjust the size of the scanned area.
- Specify the size of the original area.
- Lighten or darken the copies.
- Reduce or enlarge the copies.
- Select to Display Advanced Copy Settings.
|
|
Creative Tasks
|
- Repeat an image several times on a page.
- Enlarge or reduce an image.
- Print an image as a multi-page poster.
- E-mail an image to a friend.
- Fax using the computer's modem.
- Save an image on the computer.
- Save multiple photos.
- Edit text found in a scanned document.
- Modify an image with a photo editor.
|
Note: For more information about the Lexmark All-In-One Center main page, click Help at the top of the window.
Lexmark All-In-One Saved Images tab
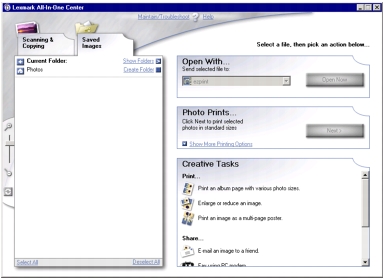
Use the Lexmark All-In-One Center Saved Images tab to perform tasks with images that are saved on the computer. The Saved Images tab offers three main functions on the right of the tab: Open With, Photo Prints, and Creative Tasks.
|
From
|
You can
|
|
Open With
|
Select a program to use with the saved image. Click Open Now to open the program you selected.
|
|
Photo Prints
|
- Print documents or single photos.
- Click Next to open Fast Pics.
- Click Show More Printing Options for more choices.
- Select the quantity and color of the copies.
- Click Print Now to print the copies.
- Select a quality setting for the copies.
- Select a paper size.
- Lighten or darken the copies.
- Reduce or enlarge the copies.
- Choose to Display Advanced Print Settings.
|
|
Creative Tasks
|
- Print an album page with photos of various sizes.
- Enlarge or reduce an image.
- Print an image as a multi-page poster.
- E-mail an image to a friend.
- Fax using the computer's modem.
- Edit text found in a scanned document.
- Modify an image with a photo editor.
|
Note: For more information about the Saved Images tab, click
Help at the top of the window.
Maintain/Troubleshoot link
The Maintain/Troubleshoot link on the Lexmark All-In-One Center provides you with direct access to the Lexmark Solution Center. Clicking Maintain/Troubleshoot lets you select from these topics:
- Maintain or fix quality problems
- Troubleshoot All-In-One problems
- Device status and ink levels
- More printing ideas and how-to's
- Contact information
- Advanced (skin, voice, and communication options)
- View the software version and copyright information
Help link
The Help link provides you with instant access to the Help program, where you can browse the context sensitive topics. Click the Index button to use the Find function.
Using Lexmark Fast Pics
Lexmark Fast Pics is an application that is part of the All-In-One Center and supports printing of photos.
Starting Lexmark Fast Pics
- Click the Saved Images tab in the All-In-One Center.
- Click the Next button.
Using Lexmark Fast Pics to print photos
- Click to place a check mark next to each photo you want to print.
- Click the Check All icon
 to select all photos.
 - Click the Uncheck All icon
 to unselect all the photos.
- You can use the slider with the zoom icons to view the photos smaller or larger.
- After choosing the photos, select a Size for each photo.
- Select a Paper size in printer.
- Select the Number of copies.
- Click the Print Now button to print your photos.
You can click Back to return to the Lexmark All-In-One Center.
Using Lexmark Photo Editor
Use the Lexmark Photo Editor software to locate, edit, and print photos.
- To open the Lexmark Photo Editor, click Start Programs Lexmark 3300 Series Lexmark Photo Editor.
You can also open the Lexmark Photo Editor from the Lexmark All-In-One Center.
- Select the Saved Images tab.
- Browse to your images.
- Select the images you want to open.
- Click Lexmark Photo Editor.
The Lexmark Photo Editor appears on the Quick Fixes page.
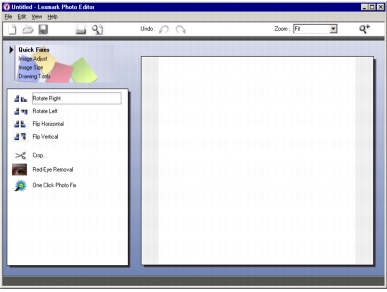
The Photo Editor has a standard menu bar with File, Edit, View, and Help menus so you can open, save, print, edit, view, and learn about editing photos.
Lexmark Photo Editor task menus
Select from these four task menus for touch-up tools to edit photos:
- Quick Fixes
- Image Adjust
- Image Size
- Drawing Tools
Each of these menus displays additional options you can use to edit photos.
Quick Fixes
Select options to make your photos look professional with little effort:
- Rotate
- Flip
- Crop
- Remove red eye caused by light reflection
- Fix your photo with one click
Image Adjust
Here you can:
- Adjust the color depth.
- Adjust the color.
- Adjust the brightness/contrast.
- Adjust the blur.
- Adjust the sharpness.
- Despeckle (blur) the image to remove dust and scratches.
- Adjust the exposure.
- Adjust the color level.
Image Size
Here you can:
Drawing Tools
Use the drawing tools to:
- Select an area by dragging a box around it. This is for cutting and copying areas.
- Drag around an area where you want to add text. A text dialog box appears where you can format the text.
- Fill pixels with color.
- Draw with a pencil tool.
- Draw with a line tool.
- Erase areas.
- Paint areas with a paintbrush.
- Use the eyedropper to pick up a color.
Using Print Properties
Print Properties controls the print options. You can open Print Properties from almost any program to change the settings for a project.
- From the program you are using to print, click the File menu Print.
Note: Changes made to the printer settings from the Printers folder become the default settings for most programs. Changes made to the settings apply only to the open file.
- In the Print dialog box, click the Properties, Preferences, Options, or Setup button (depending on the program).
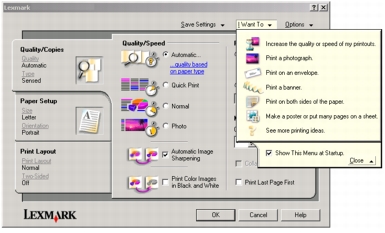
The Print Properties screen appears along with the I Want To menu.
Note: Print Properties can also be accessed in the Printers folder without using another program.
- Select Start Settings Printers.
- Right-click Lexmark 3300 Series and select Printing Preferences.
Windows 9X users: Right-click Lexmark 3300 Series and select Properties.
- Make the changes you want and click OK.
Save Settings menu
You can:
- Save your current settings.
- Delete a setting from the list of saved settings.
- Restore settings you have saved.
I Want To menu
The I Want To menu appears when you open Print Properties. You can:
- Use a variety of task wizards to help you select the correct print settings for a project, including printing: banners, posters, envelopes, and on both sides of the paper.
- Close the menu for a full view of the Print Properties dialog box.
Options Menu
You can use the:
Print Properties tabs
All of the print settings are on the three main tabs of the Print Properties software: Quality/Copies, Paper Setup, and Print Layout.
Quality/Copies tab
|
From
|
Select
|
|
Quality/Speed
|
- Automatic, Quick Print, Normal, or Photo, depending on the quality of the output you want. Quick Print is the fastest option.
|
|
Other options
|
Select Print Color Images in Black and White to save the color cartridge.
Select Automatic Image Sharpening to automatically select the best image sharpening level based on image content.
|
|
Paper Type
|
- To see the paper type found, click view the paper type automatically detected.
|
|
Multiple Copies
|
- The number of Copies you want to print.
- Collate Copies if you want to print all the pages of the first copy, and then all the pages of the second copy, and so on.
- Print Last Page First if you want to print the pages in reverse order.
|
Paper Setup tab
|
From
|
Select
|
|
Paper Size
|
Paper, Envelope, Banner, or Borderless, and the size of the paper type. If the paper size is not listed, select Custom Size.
|
|
Orientation
|
Portrait or Landscape.
|
Print Layout tab
|
From
|
Select
|
|
Layout
|
Normal, Banner, Mirror, N-up, Poster, Booklet or Borderless.
|
|
Duplexing
|
- Two-Sided to print the document on both sides of the page.
- Side Flip or Top Flip to set which way the pages of the finished documents turn.
Note: If you select Side Flip, the pages of the document turn like the pages of a magazine. If you select Top Flip, the pages turn like the pages of a legal pad.
|
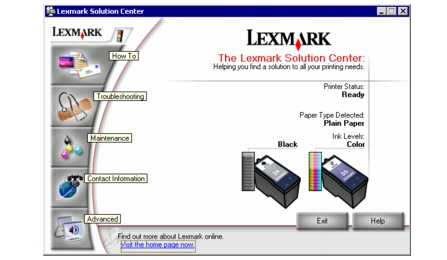
Using the Lexmark Solution Center
To open Lexmark 3300 Series Solution Center (LSC):
Solution Center tabs
The LSC has six tabs: Printer Status, How To, Troubleshooting, Maintenance, Contact Information, and Advanced.
|
From
|
You can
|
|
Printer Status (Main dialog box)
|
- View the printer status of the All-In-One. While printing, the status is Busy Printing.
- View the paper type detected.
- Access the Lexmark Web site.
|
|
How To
|
Learn how to:
- Use basic features.
- Scan, copy, fax, and print.
- Print banners, iron-on transfers, photos, envelopes, and other items.
- Find and change settings.
|
|
Troubleshooting
|
- Learn about the current printer status.
- Solve All-In-One problems.
|
|
Maintenance
|
Note: Wait until scanning is complete before installing a new cartridge.
- View shopping options for new cartridges.
- Print a test page.
- Clean to fix horizontal streaks.
- Align to fix blurry edges.
- Troubleshoot other ink problems.
- Remove Japanese postcard residue.
|
|
Contact Information
|
- Learn about available resources and offers.
- Learn how to contact Lexmark.
|
|
Advanced
|
- Change the appearance of the Printing Status window and toggle printing voice notification.
- Change the network printing settings.
- Start/stop Lexmark Connect participation.
- Obtain software version information.
- Participate in Lexmark Connect.
|
|
Note: For more information, click Help at the bottom of the LSC window.
|