Improve print quality
If you are not satisfied with the print quality of your document, first make sure you:
- Use the appropriate paper for the document. For example, use photo paper if you are printing a photo.
- Use paper that is heavier, bright white, or coated.
- Select a higher print quality:
- From the software application, choose File
 Print.
- From the pop-up menu in the upper left corner, choose Quality & Media.
- Select Automatic or Photo.
If your document still does not have the print quality you want, follow these steps:
- Reinsert the print cartridges.
- Remove the print cartridges.
- Install the print cartridges.
- Align the print cartridges from the 5200 Series Utility.
- Print your document again.
- If the print quality has not improved, continue with step 2.
- Clean the print cartridge nozzles.
- Load paper.
- Open the 5200 Series Utility.
- From the Cartridges tab, click Clean Print Nozzles.
-
A nozzle page prints, forcing ink through the nozzles to clean any that are clogged.
- Print your document again to verify that your print quality has improved.
- To further improve print quality, continue with step 3.
- Wipe the print cartridge nozzles and contacts.
-
If the print quality has not improved after cleaning the print cartridge nozzles, there may be dried ink on the nozzles or contacts.
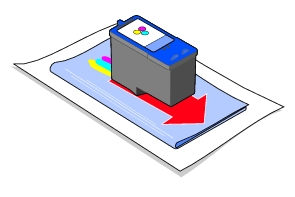
- Remove the print cartridges.
- Dampen a clean, lint-free cloth with water.
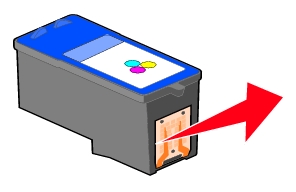
- Gently hold the cloth against the nozzles for about three seconds, and then wipe in the direction shown.

- Gently hold a clean section of the cloth against the contacts for about three seconds, and then wipe in the direction shown.

- Allow the nozzles and contacts to dry completely.
- Reinstall the print cartridges, and then print your document again.
If the print quality has not improved, clean the print cartridge nozzles up to two more times.
If print quality is still unsatisfactory, replace your print cartridges.
Related topics
Print cartridges
Preserve the print cartridges
Order supplies
 Print.
 Print.
