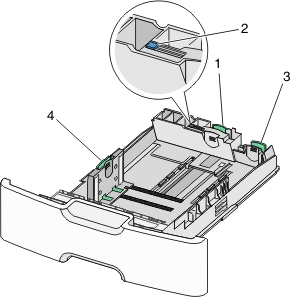
The optional 550-sheet special media tray (Tray 2) supports narrow paper sizes such as envelopes and A6.
1 | Primary length guide |
2 | Length guide lock |
3 | Secondary length guide |
4 | Width guide |
 | CAUTION—POTENTIAL INJURY: To reduce the risk of equipment instability, load each paper drawer or tray separately. Keep all other trays closed until needed. |
Notes:
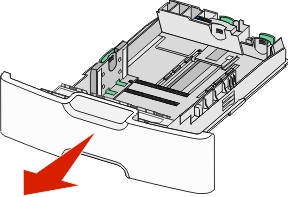
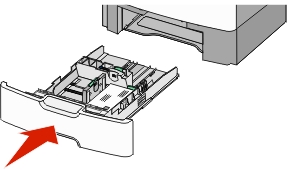
Pull the tray completely out.
| Note: Do not remove trays while a job prints or while appears on the display. Doing so may cause a jam. |
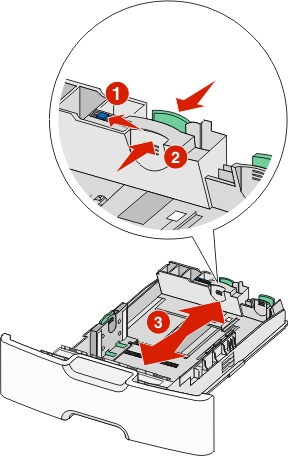
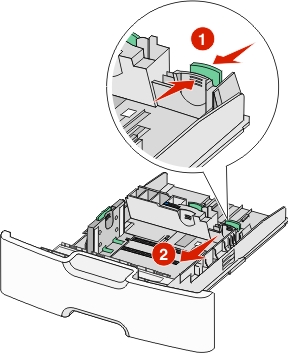
Squeeze and slide the primary length guide toward you until it stops.
Notes:
Squeeze and slide the width guide to the correct position for the paper size you are loading.
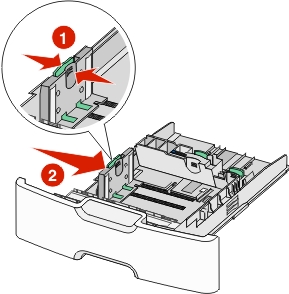
| Note: Use the paper size indicators at the bottom of the tray to help position the width guide. |
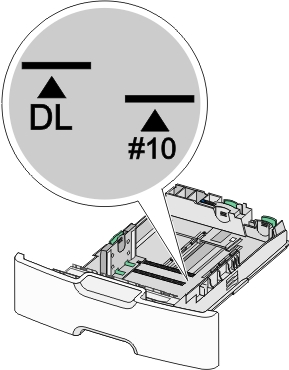
Squeeze and slide the secondary length guide to the correct position for the paper size you are loading.
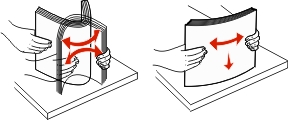
Flex the sheets back and forth to loosen them. Do not fold or crease the paper. Straighten the edges on a level surface.
Load the paper stack with the recommended printable side faceup.
Notes:
| Warning—Potential Damage: Overloading the tray can cause paper jams and possible printer damage. |
Insert the tray.
From the printer control panel, verify the paper size and paper type setting for the tray based on the paper you loaded.
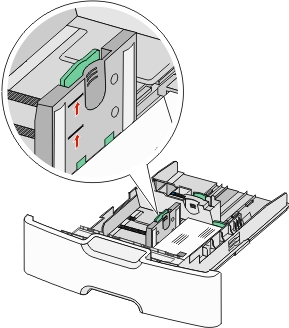
| Note: Return the secondary length guide to its original position when loading long papers such as legal, letter, and A4. Squeeze and slide the guide until it clicks into place. |