 Memory cards supported
 Inserting memory cards
 Transferring digital photos from a memory card
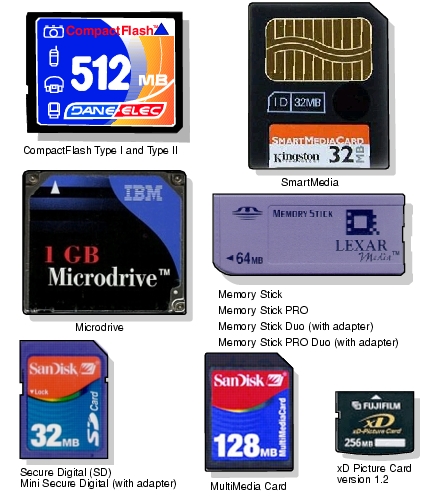
Memory cards supported
Note: Your card manufacturer may differ from the ones pictured.
Inserting memory cards
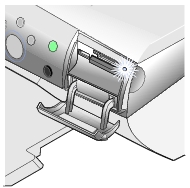
The card reader has two slots to accommodate these media and a small light that comes on when the card is inserted. The light blinks to indicate the memory card is being read or is transmitting data.
Warning: Do not remove the memory card while the light is blinking.
Note: The All-In-One recognizes only one digital media source for photos at a time.
|
Slot
|
Memory card
|
Installation
|
|
Top slot
|
- Secure Digital
- MultiMedia Card
- SmartMedia
- Memory Stick
- Memory Stick Duo (with adapter)
- Memory Stick PRO
- Memory Stick PRO Duo (with adapter)
- xD Picture Card
- Mini Secure Digital (with adapter)
|
Note: If you are using a SmartMedia card, make sure the gold contact area faces up.
Note: If you are using a Memory Stick Duo, Memory Stick PRO Duo, or Mini Secure Digital card, be sure to connect it to the adapter that came with the card before inserting it in the slot.
- If you have an arrow on your card, make sure it points toward the All-In-One.
|
|
Bottom slot
|
|
- Insert card with brand name label face up.
- If you have an arrow on your card, make sure it points toward the All-In-One.
|
|
Warning: With a memory card inserted, the memory card door may not close.
|
Transferring digital photos from a memory card
Using a computer
- Insert your digital camera memory card into the corresponding memory card slot. For help, see Inserting memory cards.
The Fast Pics dialog appears:
.jpg)
- Click Save Them On The PC.
- Select the photos that you would like to save, and click Next.
.jpg)
- Specify the location where you want to save photos, and select Save options.
.jpg)
Note: Select No unless you want to delete the photos from the memory card permanently.
- Click Save Now.
Using the control panel
- Make sure the All-In-One is connected to the computer.
- Insert the memory card. For help, see Inserting memory cards.
The I Want To... menu appears.
- Use the down arrow button to scroll to Save to Computer.
- Press Select.
Follow the instructions on the screen to specify where the images will be saved.
 Memory cards supported
 Transferring digital photos from a memory card

.jpg)
.jpg)
.jpg)