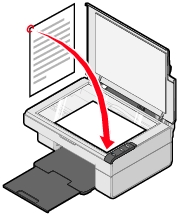
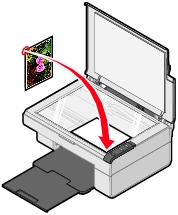
Copying

  Making a copy

  Copying photos

  Copying 4x6 photos


Making a copy

  1. Open the top cover of the All-In-One.
  2. Place the item you want to copy on the scanner glass. For more information, see Placing documents on the scanner glass.

  3. Close the top cover.
  4. Change copy settings as needed. For more information, see Changing copy settings.
  5. Press the button.

Changing copy settings

  1. Open the Lexmark Imaging Studio. For more information, see Using the Lexmark Imaging Studio.
  2. Click the Copy button.
  3. Select a copy quantity and color.
  4. Click See More Copy Settings to:
  1. Click Display Advanced Copy Settings to change options such as paper size or quality. For more information, see Advanced Copy Settings.
  2. When you are finished customizing the copy settings, click OK.
  3. On the main page, click Copy Now.

Advanced Copy Settings

Click this tab

To

Print

  • Select the paper size.
  • Select the paper type.
  • Select borderless printing options.
  • Select the print quality.

Scan

  • Select the color depth.
  • Select the scan resolution.
  • Choose to scan using pure optical resolution.
  • Select whether to auto-crop the scanned image.
  • Select an exact size to be scanned.

Image Enhancements

  • Select whether to deskew the image.
  • Select whether to sharpen blurry edges.
  • Adjust the brightness of the image.
  • Adjust the color correction curve (gamma) of the image.

Image Patterns

  • Smooth the conversion of a gray image to a black and white dot pattern (dither).
  • Select whether to process for Best quality or Best speed.
  • Select whether you are scanning a newspaper, magazine, or lithograph.
  • Control the darkness of the edges of the text.
  • Remove wavy patterns from magazines or newspapers (descreen).
  • Reduce more or less of the background noise (scratches) on the color document.


Copying photos

  1. Place the photo face down on the scanner glass. For more information, see Placing documents on the scanner glass.
  2. Load photo paper with the print side facing you. For more information, see Loading specialty media.
  3. Open the Lexmark All-In-One Center. For more information, see Using the Lexmark All-In-One Center.
  4. From the Scanning & Copying tab, click Preview Now.
  5. Adjust the dotted lines to fit around the part of the image you want to print.
  6. From the Copy area, select Photo.
  7. Select a copy quantity and color.
  8. To further customize the photo, click See More Copy Settings.
  9. When you are finished customizing the settings, click Copy Now.

Copying 4x6 photos

  1. Place the 4x6 photo face down on the scanner glass. For more information, see Placing documents on the scanner glass.

  2. Load photo paper with the print side facing you. For more information, see Loading specialty media.
  3. Press and hold the button for three seconds.

The All-In-One prints a 4x6 copy of your photo.