 |
 |
|
|
| ||
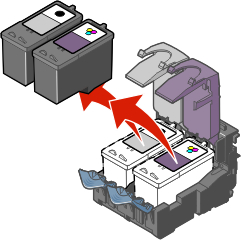
Removing both cartridges: | Removing one cartridge: | ||
 |
 |
| Note: | When removing the photo cartridge to exchange it with a black cartridge, store the photo cartridge in the storage unit provided. |
 |
 |
|
|
|
|
| ||
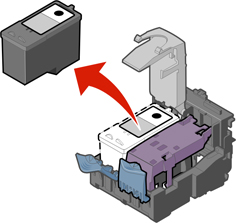
Removing both cartridges: | Removing one cartridge: | ||
|
|
|
| Note: | When removing the photo cartridge to exchange it with a black cartridge, store the photo cartridge in the storage unit provided. |
|
|
Installing the print cartridges
Preserving the print cartridges
Understanding the All-In-One parts