 Troubleshooting checklist
Setup troubleshooting
Print troubleshooting
Scan and copy troubleshooting
Fax troubleshooting
More troubleshooting options
Troubleshooting checklist
When your All-In-One has a problem, before contacting Lexmark Customer Support, check the following items:
- Is the power supply firmly attached to your All-In-One and a properly functioning electrical outlet?
- Are both your All-In-One and computer on?
- Is your USB cable securely attached to your All-In-One and to your computer or Lexmark adapter?
- Did you remove the sticker and transparent tape from the back and bottom of both print cartridges?
- Is your operating system compatible with your All-In-One? The Lexmark 4200 Series supports these operating systems:
- Windows 98
- Windows Me
- Windows 2000
- Windows XP
From your desktop, click Start  Programs or All Programs.
If Lexmark 4200 Series does not appear in your list of programs, install the All-In-One software.
To set the All-In-One to be the default printer:
- Click Start Settings Printers.
- Right-click the Lexmark 4200 Series and make sure that Set as Default is selected.
- If you are using your All-In-One with your computer, is your All-In-One connected directly to your computer? If it is connected through an external device, such as a USB hub or switch box, follow these steps:
- Disconnect your All-In-One from any external devices.
- Connect your All-In-One directly to your computer with a USB cable.
- Follow these instructions to print a test page.
- Open the Lexmark Solution Center. For help, see Using the Lexmark Solution Center.
- From the Maintenance tab, click Print a Test Page.
- If the test page prints, the problem may be with your external devices, not your All-In-One. Check the documentation that came with your external devices for help.
- If the test page does not print, refer to the All-In-One software Help for further troubleshooting information.
|
For help with:
|
See these topics:
|
|
Setup
|
|
|
Printing
|
|
|
Scanning and copying
|
|
|
Faxing
|
Fax troubleshooting
|
Setup troubleshooting
Power light does not come on
- Check the power supply connections. Make sure the power supply is pushed all the way into the connector on the All-In-One.
- Press Power on the control panel.
When I insert the All-In-One software CD, nothing happens
From the desktop, double-click the My Computer icon, and then double-click the CD-ROM drive icon. If necessary, double-click setup.exe, and then follow the instructions on the screen to install the software.
Print troubleshooting
Document does not print
- Use an undamaged USB cable.
- Check your All-In-One status to make sure your document is not being held or paused.
To check All-In-One status:
- Click Start Settings Printers.
- Double-click the Lexmark 4200 Series icon, and then click Printer.
- Make sure no check mark appears next to Pause Printing.
- Print a test page.
Document prints slowly
- Close programs not in use.
- Reduce the print quality resolution (Quick and Normal print more quickly than Better and Best).
Note: Photos or documents containing graphics may take longer to print than regular text.
Document misfeeds or jams
Paper misfeeds or multiple sheets feed
- Use a paper recommended for inkjet printers.
- Do not force the paper into the All-In-One.
- Do not load too much paper into the All-In-One. For help, see Load up to:.
- Make sure the paper guide rests against the left edge of the paper and does not cause the paper to bow in the paper support.

- Place the All-In-One on a flat, level surface.
Paper jams
If a paper jam occurs in the paper support or the ADF, remove the paper from the All-In-One. If the paper is lodged too far into the All-In-One and cannot be removed:
- Press Power to turn the All-In-One off.
- Open the control panel and pull slowly and firmly on the paper to remove it.
If you cannot reach the paper because it is too far into the All-In-One:
- Open the cartridge access door, and then pull the paper out.
- Close the cartridge access door, and then close the control panel firmly until it snaps into place.
- Press Power to turn the All-In-One on, and then print your document.
Note: If you are printing a banner, make sure you choose Letter Banner or A4 Banner in Print Properties. For help, see Using Print Properties.
Document prints poorly
Document is too light or too dark
You can lighten or darken your document from the control panel.
- On the control panel, press Lighter/Darker.
- Press the right arrow to darken your document or the left arrow to lighten it.
- When the asterisk (*) on the display moves to a satisfactory position, press Select.
Vertical, straight lines are not smooth
To improve the print quality of vertical, straight lines in tables, borders, and graphs:
Print is too dark or smudged
- Let the ink dry before handling the paper.
- Select the correct paper type and size in Properties, Preferences, or from the All-In-One Center.
- Make sure the paper is straight and unwrinkled.
- Select the appropriate quality for the paper type. If you are printing on inkjet paper, select Quick Copy from the Quality/Copies tab of Properties, Preferences, Options, Setup or from the All-In-One Center.
Printed pages have alternating bands of light and dark print (intermittent printing)
If your document has alternating bands of light and dark print, you might need to select the highest print quality.
- With your document open, click File Print.
- In the Print dialog box, click Properties, Preferences, Options, or Setup (depending on your program or operating system).
- Select Best on the Quality/Copies tab.
Print quality is poor at the edges of the page
Like other All-In-Ones, the Lexmark 4200 Series cannot print in the extreme left, right, top, or bottom edges of a page. Use these minimum settings:
- 6.35 mm (0.25 inches) for all paper sizes except A4
- 3.37 mm (0.133 inches) for A4 size paper
1.7 mm (0.067 inches)
16.51 mm (0.65 inches)
Colors are faded, not printing, or not printing completely
- Check the ink level graphic on the Cartridges tab of the Lexmark Solution Center.
- Use a different color setting.
- Make sure you removed the sticker and tape from the bottom of both cartridges.
- If you previously changed the Lighter/Darker setting on the All-In-One or in the All-In-One Center, change the setting back to the default setting.
Scan and copy troubleshooting
Scanned documents are not clear
Clean the scan lens and the white roller. For help, see Cleaning the scan lens and white roller.
Display language is not preferable
If the language on the All-In-One display is not the language you prefer, follow these steps to change it:
- On the control panel, press Options until Language appears on the display.
- Use the right arrow to scroll through the list of languages.
- When your preferred language appears on the display, press Select to save that language as the default.
All-In-One is not communicating with the computer
- Disconnect, and then reconnect both ends of the USB cable. For help, see your setup documentation.
- Unplug the power supply from the electrical wall outlet, and then reconnect the power supply. (For help, see your setup documentation.) Make sure the power light comes on. If it does not come on, press Power.
Black and white copy quality is unsatisfactory
You might need to change an Advanced Copy Setting in the All-In-One Center.
- From your desktop, double-click the Lexmark 4200 Series All-In-One Center icon.
The All-In-One Main Page appears.
- Click See More Copy Settings.
- Click Display Advanced Copy Settings, and then the Scan tab.
- From the Color depth drop-down menu, select Gray.
- Click OK.
Document has a checkerboard pattern
If you scan or copy from a printed source and see a checkerboard pattern on your document, follow the instructions below to eliminate the pattern.
For scanning:
- From your desktop, double-click the Lexmark 4200 Series All-In-One Center icon.
The All-In-One Main Page appears.
- Click See More Scan Settings.
- From the What is being scanned? menu, select Magazine.
- Click Scan Now.
For copying:
- From your desktop, double-click the Lexmark 4200 Series All-In-One Center icon.
The All-In-One Main Page appears.
- Click See More Copy Settings.
- Click Display Advanced Copy Settings.
- Select the Image Patterns tab.
- Make sure the second box is checked to remove image patterns from magazine or newspaper documents.
- Click OK.
Scanned image is unsatisfactorily cropped
You can turn auto-cropping off or adjust how the image is cropped.
To turn auto-cropping off:
- From your desktop, double-click the Lexmark 4200 Series All-In-One Center icon.
The All-In-One Main Page appears.
- Click See More Scan Settings.
- Click Display Advanced Scan Settings.
- Click the Scan tab.
- Click Select area to be scanned, and then select a size from the drop-down menu.
- Click OK.
To adjust how the image is cropped:
- From your desktop, double-click the Lexmark 4200 Series All-In-One Center icon.
The All-In-One Main Page appears.
- Click See More Scan Settings.
- Click Display Advanced Scan Settings.
- Click the Scan tab.
- Select Auto-crop the scanned item.
- Adjust the slider to the left to crop less or to the right to crop more.
- Click OK.
Edges of my document are cropped
If your document is cropped on the edges:
- On the control panel, press Copy.
- Press Options until Reduce/Enlarge appears on the screen.
- Press the right arrow until Fit to Page appears.
- Press Select.
Note: Faxes are automatically fit to page.
All-In-One displays error messages
Use this section to understand All-In-One software error messages on your computer screen or control panel display.
Ink Low message
- A print cartridge is running out of ink. The Ink Low warning occurs when your cartridges are about 25% full, 15% full, and 5% full. When one of these messages appears, you can:
- Click OK.
- Click the ? to get information about ordering supplies.
- Order a new cartridge or locate a dealer near you from the Lexmark Web site at www.lexmark.com.
For help installing a new cartridge, see Replacing the print cartridges.
Paper Jam message
If your All-In-One has a paper jam, one of these messages appears on the display:
- Press Power, then clear paper jam
- Clear paper jam//Press Stop/Clear
Follow the instructions on the display to clear the message. For more help clearing paper jams, see Paper jams.
Paper Out message
If your All-In-One is out of paper, Load paper then press Select appears on the display.
- Follow these instructions to clear the message from the display.
- Print your document.
Note: If your All-In-One has a paper jam, see Paper Jam message for help.
Cartridge Error: 1203
Your print cartridge has a short.
- Press Power to turn your All-In-One off.
- Unplug your All-In-One from the wall outlet.
- Plug in your All-In-One.
- Reinstall the cartridges.
If this does not resolve the problem, see More troubleshooting options, or replace your cartridges.
Hardware Error: 1200
The All-In-One is stalled.
- Press Power to turn your All-In-One off.
- Unplug your All-In-One from the wall outlet.
- Check for paper jams.
- Plug in your All-In-One.
Cartridge Error
The cartridge carrier is jammed.
- Press Power to turn your All-In-One off.
- Unplug your All-In-One from the wall outlet.
- Open the control panel.
- Open the cartridge access door.
- Make sure the cartridges are snapped into place in the carrier.
- Check for objects obstructing the carrier.
- Plug in your All-In-One.
- Press Power to turn your All-In-One on.
Power light blinks twice
The print cartridge carrier might be stalled. Check your computer screen for error messages.
- Turn the All-In-One off.
- Wait a few seconds, and then turn the All-In-One on.
Remove and reinstall the software
If the All-In-One is not functioning properly or if a communications error message appears when you try to use your All-In-One, you may need to remove and reinstall the printer software.
- From your desktop, click Start Programs Lexmark 4200 Series Uninstall Lexmark 4200 Series.
- Follow the instructions on your screen to remove the All-In-One software.
- Restart your computer before reinstalling the All-In-One software.
- Insert the CD, and then follow the instructions on your screen to install the software.
Fax troubleshooting
Find the problem below that best matches the problem you are having:
|
Symptom:
|
Problem:
|
Solution:
|
|
Cannot send fax
|
Is the AIO turned on?
|
Press the Power button. The power light comes on.
|
|
Are the fax number, country code, and date/time set correctly?
|
You must set your fax number, your country code, and your time/date. To set your fax number, see PERSONALIZE FAX. To set your country code, see COUNTRY CODE. To set your time/date, see Setting the date and time on the display.
|
|
Is the AIO connected to an unsupported line (DSL, ISDN, PBX, or cable modem)?
|
Set up your AIO with a filtering device so that you can use with the unsupported line. For more information, see Connecting to unsupported lines.
|
|
Is the phone line in use by another device?
|
If your AIO shares a phone line with a dial-up modem, make sure that you are logged off of the Internet when you send or receive faxes.
If you set up your AIO to use Distinctive ring, make sure that the phone line is not in use before you send or receive faxes.
|
|
Is the original document loaded correctly?
|
Load the original face down in the ADF. See Loading an original document into the ADF.
|
|
Is there a paper jam?
|
See Paper jams.
|
|
Is the memory full?
|
Send the fax one page at a time.
Dial the fax number and then scan your document.
|
|
Cannot send fax
|
Are the connections (power supply, telephone, handset, answering machine) loose?
|
Make sure all the connections are secure.
|
|
Is Speed Dial set correctly?
|
See Setting up Speed Dial.
|
|
Cannot receive fax
|
Is the paper loaded correctly?
|
See Loading plain paper into the paper support or Loading an original document into the ADF.
|
|
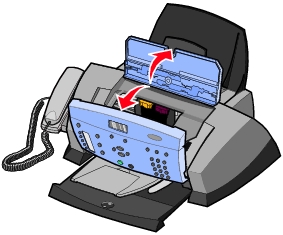
Are the sticker and tape removed from the print cartridges?
|
Remove the sticker and transparent tape from the bottom of the print cartridges.
|
|
Is a print cartridge low or out of ink?
|
Replace the print cartridge with a new cartridge.
|
|
Is Distinctive Ring set correctly?
|
See Distinctive ring patterns.
|
|
Is there a paper jam?
|
See Paper jams.
|
|
Is Call Waiting interfering with fax transmission?
|
Before sending a fax, disable Call Waiting. Contact your telephone service provider for instructions on how to temporarily disable Call Waiting.
|
|
Received fax is blank
|
Is the original fax loaded upside down?
|
Make sure the original fax is loaded face down in the ADF.
|
|
Is the receiving fax machine out of ink?
|
Replace the print cartridge with a new cartridge.
|
|
Are both the black and color cartridges installed?
|
Install both print cartridges. The AIO only works if you have both cartridges installed. For help installing the cartridges, see Replacing the print cartridges.
|
|
Are the date and time set correctly?
|
See Setting the date and time on the display.
|
|
Received fax has poor print quality
|
Does the original document have poor quality?
|
Make sure the quality of the original document is satisfactory.
|
|
Is the ink low on the receiving fax machine?
|
Replace the print cartridge with a new cartridge.
|
|
Is the print quality set correctly on the receiving fax machine?
|
Make sure the print quality settings on the receiving fax machine are satisfactory.
|
More troubleshooting options
If the preceding solutions do not solve the problem you are having with your All-In-One, refer to the Lexmark Solution Center software for more troubleshooting information:
- Click Start Programs Lexmark 4200 Series Lexmark Solution Center.
- Click the Troubleshooting tab on the left side of the screen.
Go to http://support.lexmark.com/ for more help.