 Opening the box
 Setting up the All-In-One with a computer
Setting up the All-In-One without a computer
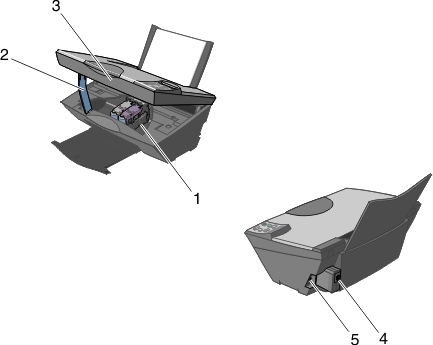
Understanding the All-In-One parts
To set up your All-In-One, follow the instructions on the Lexmark 5200 Series setup documentation to in stall the hardware. If problems occur during the setup process, see Setup troubleshooting.
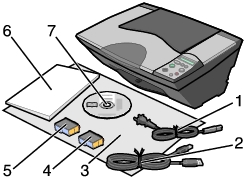
These items are in the box with your All-In-One:
Note: A USB cable may or may not be included.
|
1 |
Power supply cord |
5 |
Black or photo print cartridge |
|
2 |
USB cable |
6 |
User's Guide |
|
3 |
Setup sheet |
7 |
Software CD |
|
4 |
Color print cartridge |
||
If you have not already done so, follow the steps on the Setup sheet to complete the hardware and software installation. If problems occur during the setup process, see Setup troubleshooting.
If you are using your All-In-One without a computer, make sure you follow the steps on the Setup sheet to complete hardware installation. Continue with the following steps to optimize print quality.
During printing, a message on the control panel display reads .
When it finishes, the message reads .
The tables describe each part.
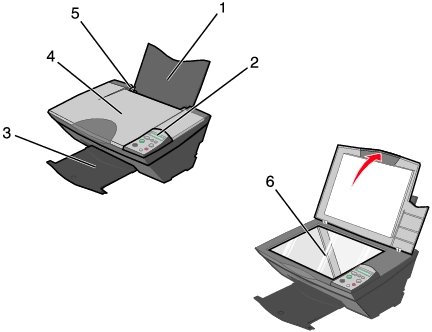
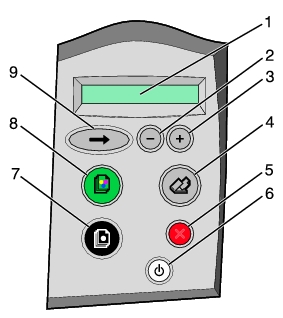
The All-In-One has a control panel that lets you scan and copy with the press of a button and a display that alerts you to the number of copies selected, as well as quality, brightness, and resize settings.
|
|
Use this |
To |
|---|---|---|
|
1 |
Display |
|
|
2 |
-
|
|
|
3 |
+
|
|
|
4 |
Scan
|
Start the scanning process and open the Lexmark All-In-One Center.
|
|
5 |
Cancel
|
|
|
6 |
Power
|
Turn the All-In-One on or off.
|
|
7 |
Black Copy
|
Make a black and white copy.
|
|
8 |
Color Copy
|
Make a color copy.
|
|
9 |
Arrow
|
Scroll through the available menus on the display.
|
Pressing the Arrow button ![]() presents menus on the display in this order:
presents menus on the display in this order:
Note: The Arrow button ![]() is also used if you run out of paper while printing. See Error messages troubleshooting.
is also used if you run out of paper while printing. See Error messages troubleshooting.