 Opening the box
 Installing another language control panel
Setting up the All-In-One with equipment
Using a PictBridge-enabled digital camera
To set up your All-In-One, follow the steps on the Setup sheet. If problems occur, see Setup troubleshooting.
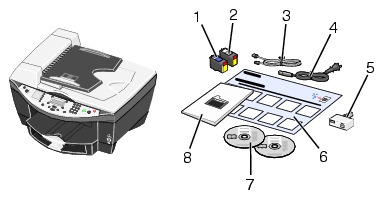
These items are in the box with your All-In-One:
|
1 |
Black print cartridge |
2 |
Color print cartridge |
|
3 |
Phone cord |
4 |
Power cord |
|
5* |
Phone line adapter |
6 |
Setup sheet |
|
7 |
Installation CDs |
8 |
User's Guide |
* Not shipped in all countries and regions.
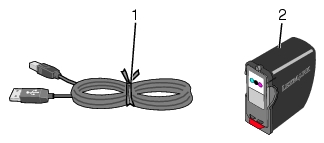
Usage information will be available in Help after you install the software on this CD.
The following instructions apply only if you received an additional language control panel with your All-In-One.
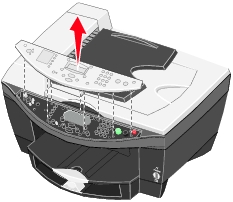
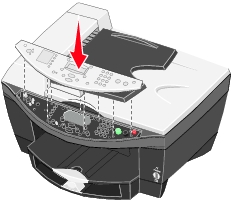
Note: See Using the control panel for information about each of the buttons.
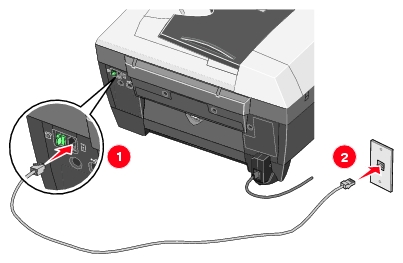
You can also connect your All-In-One with equipment, such as a telephone, an answering machine, or a computer modem. If problems occur, see Setup troubleshooting.
Note: The Lexmark™ 7100 Series All-In-One is an analog device that works best when directly connected to the wall jack. Other devices (such as a telephone or answering machine) can be successfully attached to pass through the All-In-One, as described in the setup steps. If you want a digital connection such as ISDN, DSL, or ADSL, a third-party device is required.
You can use the All-In-One to do a variety of things. A few important things to note:
Note: The All-In-One must be connected to a telephone line for faxing to function (attached to a computer or unattached).
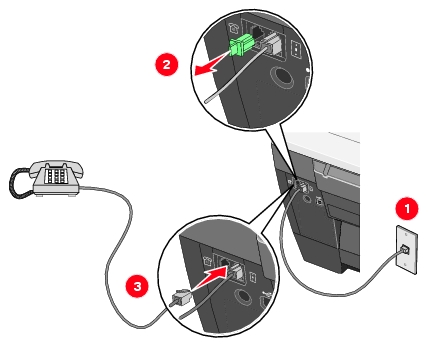
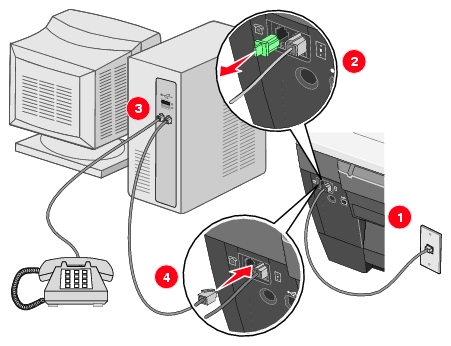
You can connect your All-In-One to other equipment. For help, see the instructions for the equipment you want to connect to the All-In-One.
|
Equipment |
Benefits |
See this section |
|---|---|---|
|
Send and receive faxes without the use of a computer. |
||
|
Receive both incoming voice messages and faxes. |
||
|
Allows you to have a telephone close to your All-In-One. |
Note: The phone cord must be connected into the correct port.
Note: See Manually for a special setup option for manual receive modes.
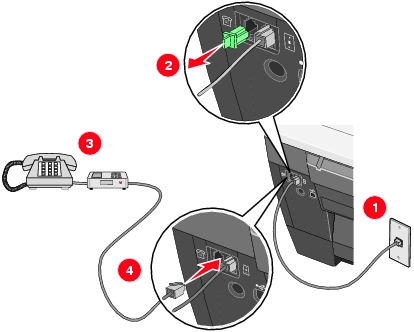
Note: The answering machine must be connected directly to the All-In-One to avoid recording fax tones.
Note: See Answering machine for a special setup option for using an answering machine.
Note: To receive soft copy faxes, the All-In-One Auto Answer feature must be turned off.
Note: See Manually for a special setup option for manual receive modes.
You can connect a PictBridge-enabled digital camera to your All-In-One and use the buttons on the camera to select and print your photos.
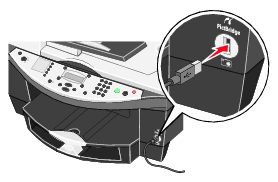
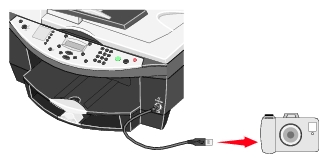
Note: Make sure the PictBridge-enabled digital camera is set to the correct USB mode. For help, see your camera documentation.