Scan a photograph
- Load originals on the scanner glass.
- Open the Lexmark 2200 Series Center.
- Select the Scan tab.
- From the What is being scanned? area, select Photo.
- From the How will the scan be used? pop-up menu, choose To be printed or Viewed on-screen/Web page.
- From the Send scanned images to: pop-up menu, choose a destination or application for your scanned photo.
- Select Prompt for multiple pages if you have several photographs to scan.
- If you want to scan the image using the settings in the Scan tab, proceed to step 12.
Click the Preview... button if you want to view your scanned image and further adjust scan settings in the Scan dialog.
- From the Settings tab:
- Select any of these preset scan settings:

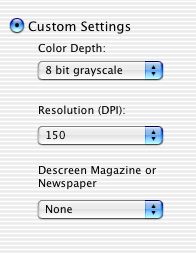
- You can also select Custom Settings to manually adjust the color depth and resolution, and choose a descreening option.
- From the Adjustments tab, customize the settings, as needed.
- From the preview area, crop your photos, if needed. For help, go to Crop photos.
- Click Scan.
Your scanned photos are sent to your selected destination folder or opened in your photo software application for saving or editing.
Related Topics
Work with photos
Save a scanned item