Back to Main Page

Cropping an image

Both the Scan tab and the Copy dialog have the cropping function.

  1. Load the document on the scanner glass.
  2. Open the Lexmark 3300 Series Center. The Lexmark 3300 Series Center Main Page appears.
  3. Click Preview/Edit.
  4. Select Auto-crop sensitivity.
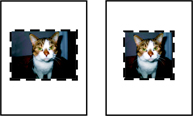
A dashed border appears around the image. When you select Auto-crop, the software automatically determines the best crop area.

  1. Use the slider to adjust the crop area.
    Note: Check the height and width display and the file size information at the bottom of the preview area to guide you as you crop the photos. The height, width, and file size of the scanned image are displayed progressively as you adjust the auto-crop sensitivity slider. If the dashed border seems to disappear, the crop area is set beyond the size of the scanned image.
  2. Click Preview Again to apply the settings and refresh the image on the preview area.
  3. If you are satisfied with the cropped image, click
    • Scan to save or send the image to an application
    • Copy to print the cropped image or document
  4. If you are not satisfied with the cropped image, do a manual cropping:
    1. Click inside the preview area. This turns off the auto-cropping mechanism.
    2. Click and drag the crop area to select the part of the photo that you want scanned or copied. Drag the dashed border to expand or contract the crop area.
    3. Click Preview Again to apply the settings and refresh the image in the preview area.
    4. Click Scan to save or send the image to an application or Copy to print the cropped image or document.
Related topics

Loading originals on the scanner glass

Printing an image as multiple-page poster

Resizing an image

Back to Copying
Back to Scanning
Back to Main Page