Customize your print environment
Cloud Print Management overview
Cloud Print Management lets you securely submit and release print jobs at an enabled printer and then capture that activity in Analytics. There are several ways you can choose to submit and release print jobs and any or all may be used in your organization. The various ways of submitting and release print jobs are as follows:
Print Release
Hybrid Print Release
Direct Print
Notes:
- All methods require connectivity with Lexmark Cloud Services.
- All printers used with Cloud Print Management must be enrolled in Cloud Fleet Management.
Print Release
Print Release lets you submit print jobs to Lexmark Cloud Services, where they are securely stored while waiting to be printed. To print submitted jobs, log in at a printer configured for Print Release and then select the jobs that you want to print. The printer reports the job metrics to the Analytics services for your review and analysis.
Print jobs may be submitted using any of the following methods:
A client application on the workstation
Dragging-and-dropping in the Cloud Print Management portal
A print extension added to the Google Chrome browser
The Lexmark Print application for the iOS operating system software or the Android platform
An e-mail sent to an address configured for your organization
Hybrid Print Release
When you print using Hybrid Print Release, a client application on their workstation securely stores the print job on your workstation and then informs Lexmark Cloud Services that a user has a hybrid print job ready to be released. When the user authenticates, and selects their print job for release, the printer communicates directly with your workstation to release the print job. The print job never leaves your organization’s network.
Note: Make sure that your workstation is online when retrieving the hybrid print job, and that a client application is installed on each of your workstations.
Direct Print
Direct Print lets you submit print jobs directly to an administrator-designated, network-connected printer using port 9100 through a client application on your workstations. The print job never leaves your organization’s network. The print job never leaves your organization’s network.
Using Cloud Print Management
Cloud Print Management roles
Roles must be based upon the users’ needs and job activities. Users who receive access to a print release method must have at least one of the following roles:
Users who will be submitting and releasing print jobs:
For Print Release—Print Release Management User
For Hybrid Print Release—Hybrid Print Management User
For Direct Print—Direct Print Management User
Users who will be administering the print environment for their organization:
For Print Release—Print Release Management Administrator
For Hybrid Print Release—Hybrid Print Management Administrator
For Direct Print—Direct Print Management Administrator
Users who need to review the print activity of their organization, but will not be administering the print environment:
Channel Partners who can administer any of the print release methods in their customer’s organization must be a member of a Child Organization Access Group that includes the appropriate administrator role for the print release method:
For more information on user roles definition, see Understanding roles.
Assigning roles
User roles are managed from the Account Management portal. You can assign roles to users in three ways:
Assigned to an individual user—Requires assigning roles manually to each user.
Assigned through group membership—Allows a set of roles to be given to users by making them a member of a group. Users can be members of more than one group.
Assigned as an organization role—Automatically assigns the organization roles to all users in the organization.
Note: The assignment method depends on the needs of the organization. For more information, see
Overview.
Understanding Cloud Print Management administrative options
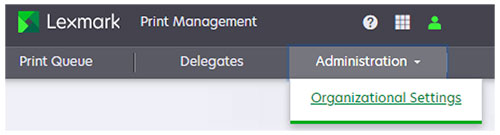
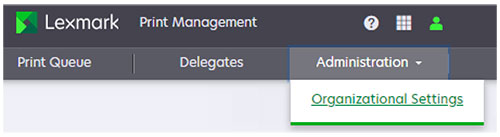
Various Cloud Print Management features and functions can be tailored through the Organizational Settings menu. From the Print Management portal, click Administration > Organizational Settings.
Note: The user must have the
Print Release Management Administrator role to see and access the Administration menu. For more information, see
Configuring organizational settings.
Deploying the Cloud Print Management bundle
Before you can use Cloud Print Management to release print jobs, you must deploy the Cloud Print Management eSF application bundle.
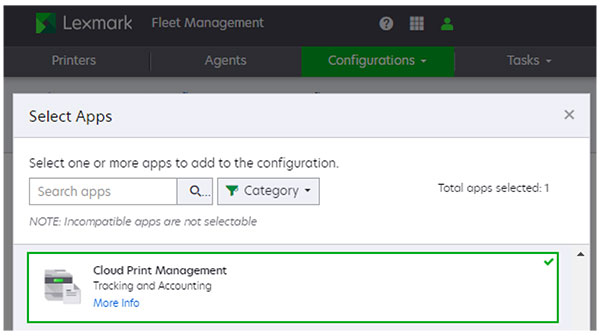
Creating a configuration for Cloud Print Management
The eSF applications that make up the Cloud Print Management bundle are deployed from the Fleet Management portal by creating a configuration. For more information on creating a configuration, see Creating a configuration.
Note: Only printers managed by Cloud Fleet Management can have the Cloud Print Management bundle deployed from the Fleet Management portal.
Deploying a Cloud Print Management configuration
You can apply a configuration to multiple printers simultaneously and then reuse it anytime.
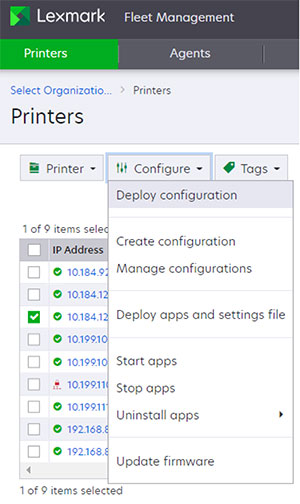
From the Fleet Management portal, click the Printers tab.
Select one or more printers, and then click Configure > Deploy configuration.
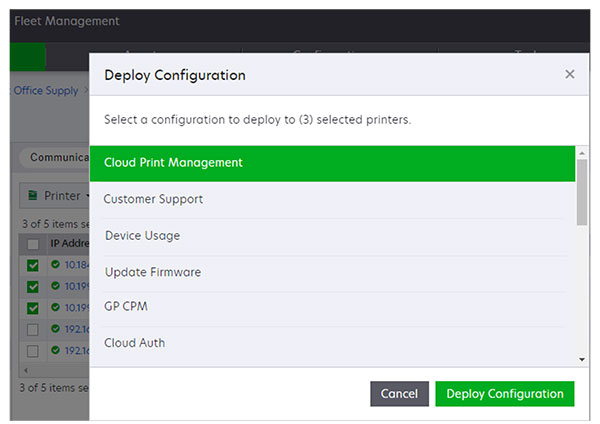
In the Deploy Configuration window, select the configuration, and then click Deploy configuration.
Using Cloud Print Management clients
To use Cloud Print Management, Hybrid Print Release, or Direct Print, you must install the Lexmark Print Management Client (LPMC) client application on the users’ workstations.
Downloading a client package
You can download the LPMC from the Print Clients tab in the Print Management portal.
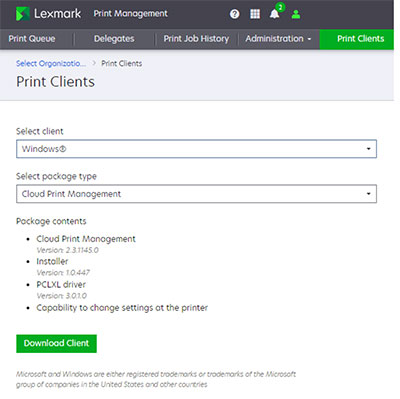
From the Print Management portal, click Print Clients.
In the Print Clients page, do the following:
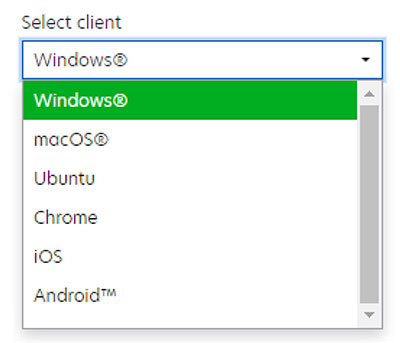
From the Select client menu, select any of the following:
Windows
macOS
Ubuntu
Chrome—The Cloud Print Management for Google ChromeTM extension on the Chrome Web Store for use with the Google Chrome operating system and Chrome browser
iOS—The Lexmark Print application for iOS on the Apple App Store online store
AndroidTM—Lexmark Print application for Android on Google PlayTM store
Note: If you select Chrome, iOS, or Android, then you are provided a link to the external site for the Lexmark Cloud Services print client application.
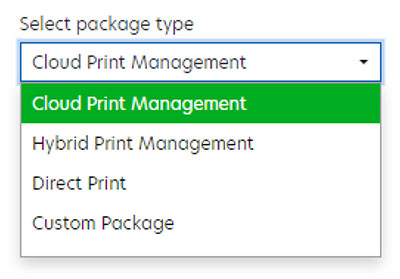
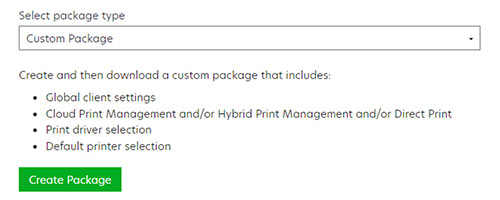
From the Select Package Type menu, select any of the following:
Note: You can download an LPMC package with default settings for Cloud Print Management, Hybrid Print Release, or Direct Print. You can also create a customized LPMC package by selecting the Custom Package option.
Cloud Print Management
Hybrid Print Management
Direct Print
Custom Package
If you selected Cloud Print Management or Hybrid Print Management, then click Download Client to download the package.
If you selected Custom Package, then you have to create a custom package.
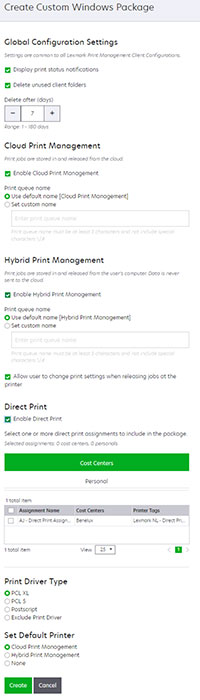
Creating a custom LPMC package
The Custom Package option lets you create an LPMC installation package that is suited to your needs. To customize, you can do any of the following:
Combine one or more submission types in a single package. A single package can include Cloud Print Management, Hybrid Print Management, and Direct Print.
Change global client settings.
Select the print driver to install.
Set an LPMC print queue as the default print queue on the workstation.
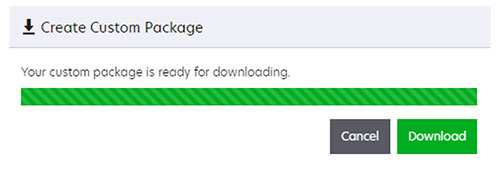
Once the custom package is ready, click Create > Download.
Note: The package is a compressed file that must be extracted before installation.
Installing Lexmark Print Management clients on workstations
After downloading default LPMC client applications, from the Client Download page, you can install them on workstations. For custom packages, you must extract the downloaded file before installing them. For more information on installing LPMC, see Installing the Lexmark Print Management Client.
Printing with Cloud Print Management
You can submit print jobs using the following ways:
Printing from your workstation
From your workstation, you can submit print jobs by doing one of the following:
From a desktop application, select File > Print, and then select a Print Management queue.
From the Google Chrome operating system or browser, select File > Print, and then select a Print Management queue.
Using email
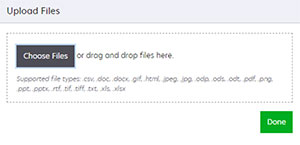
Submitting a print job in the Print Management portal
From the Print Management portal, click Print Queue > Upload File.
Drag and drop files in the Upload File window or click Choose Files to browse to the file you want to print.
Click Done.
Submitting a print job from your mobile device
Using Cloud Print Management with third-party printers
You can use Cloud Print Management with printers that do not support eSF applications, including Lexmark printers that are not solutions-enabled and printers from third-party manufacturers.
Cloud Print Management is enabled on these printers by using the ELATEC TCP3 adapter, a device that connects between the customer’s network and the printer. It also provides a USB connection for badge or card readers. The TCP3 adapter handles all user badge or card authentication and passes the user’s print jobs from Lexmark’s Cloud Print Management service to the printer. For more information, including limitations on using the ELATEC TCP3 adapter, see Printing jobs from third-party printers using Cloud Print Management.
Note: The Elatec TCP3 Adapter receives power either from an external 5Volt power source or from an Ethernet connection that supports power over ethernet. See the Technical Manual provided with the Elatec TCP3 for more details.
Using Direct Print
Direct Print overview
Direct Print lets you submit print jobs directly to an administrator-designated, network-connected printer using port 9100 through a client application on your workstations. The print job never leaves your organization’s network.
Print jobs are sent using port 9100 by the Lexmark Print Management Client (LPMC) directly to an administrator-designated, network-attached printer. When using the Direct Print feature, print jobs never leave your organization’s local network. The LPMC reports job metrics to Lexmark Cloud Services.
Enabling Direct Print
Enroll printers for Direct Print in Cloud Fleet Management and assign a tag to them. For more information, see Assigning printers to Direct Print.
Enable Direct Print for the organization. For more information, see Enabling Direct Print.
Create Direct Print assignments. For more information, see Creating Direct Print assignments.
Download and install the Lexmark Print Management Client configured for Direct Print. For more information, see Using Direct Print clients.
Notes:
- You must have the Direct Print Release Administrator role.
- Connectivity with Lexmark Cloud Services is required.
- A Direct Print configuration file must be applied when the LPMC is installed to enable Direct Print functionality.
- Printers used by Direct Print must be enrolled in Cloud Fleet Management.
Printing with Direct Print
You can submit print jobs by clicking File > Print from desktop applications, and then selecting a Direct Print queue.
Note: Using Direct Print to submit jobs is supported in desktops only, not in mobile devices.
Direct Print roles
Users given access to the Direct Print feature of Cloud Print Management must have at least one of the following roles based on tasks that they plan to perform:
Users submitting and releasing print jobs using Direct Print must have the Direct Print Management User role.
Users managing Print Management for their organization must have the Direct Print Management Administrator role.
Users generating organizational Cloud Print Management reports but do not have the Direct Print Management Administrator role must have the Print Release Management Reporting Analyst role.
Channel partners who manage printers in their customers’ organizations must be members of a Child Organization Access Group. The group must have the Direct Print Management Administrator role assigned to it.
Notes:
- Before a channel partner can administer Cloud Print Management in a customer organization, you must enable Cloud Print Management in the channel partner’s organization. For more information, see Assigning roles.
- For more information on roles, see Understanding roles.
Assigning roles
User roles are managed from the Account Management portal. You can assign roles to the users in the following ways:
Assigned roles individually—Requires that assigning roles manually to each user.
Assigned roles through groups—Allows a set of roles to be given to users by making them a member of a group. Users can be members of more than one group.
Inheritance through organization roles—Automatically assigns the organization roles to all users in the organization.
The assignment method depends upon the needs of the organization. For more information, see Assigning roles.
Assigning printers to Direct Print
Printers used with Direct Print must be enrolled in Fleet Management. Each printer must also have at least one Fleet Management tag applied to it.
For more information on enrolling printers in Fleet Management, see Enroll your printers.
For more information on applying tags to printers, see the following:
Enabling Direct Print
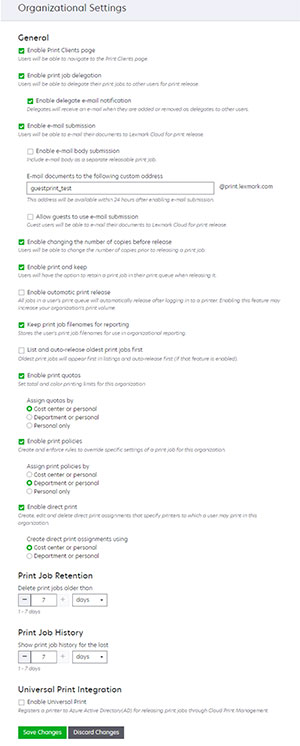
Direct Print is enabled on the Print Management Organizational Settings page.
From the Print Management web portal, click Administration > Organizational Settings.
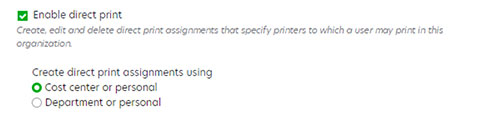
Select Enable direct print.
Select whether to use a cost center or a department.
Notes:
- The Direct Print assignment applies to all members of the designated cost center or department. In either case, Direct Print assignments can also be applied to individual users.
- You must have the Direct Print Release Administrator role to enable Direct Print.
- Users must have the Direct Print Release User role to use Direct Print.
- Cost centers and departments are defined and assigned to users in the Account Management portal.
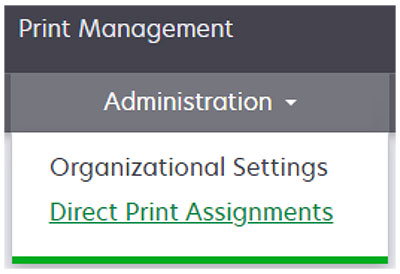
If Direct Print is enabled, then an additional menu item is available in the Administration menu.
Creating Direct Print assignments
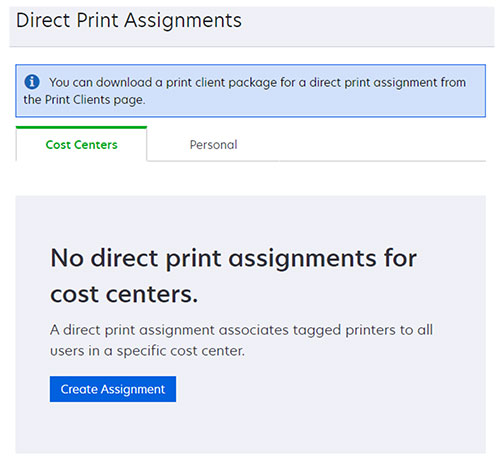
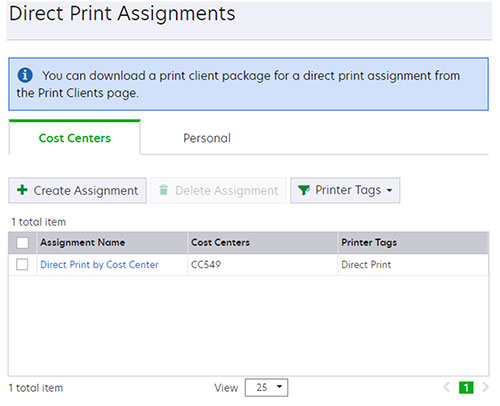
From the Print Management web portal, click Administration > Direct Print Assignments.
Depending on your requirement, select the Cost Center or Department or Personal tab, and then click Create Assignment.
Note: If there are existing Direct Print assignments, then the Direct Print Assignments page shows them.
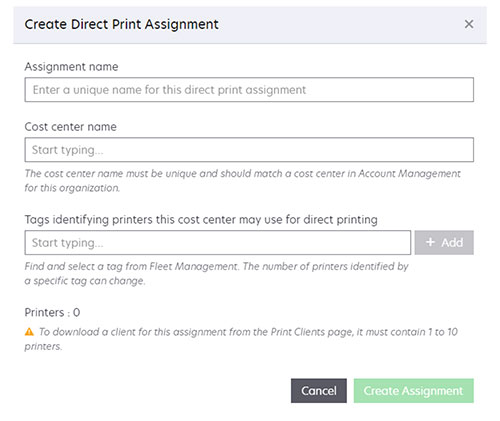
In the Create Direct Print Assignment window, do the following:
Note: The Direct Print assignment applies to all members of the designated cost center or department. In either case, Direct Print assignments can also be applied to individual users.
Cost Center or Department assignments—Cost center and department assignments are applied to all members of that cost center or department.
Note: The Create Assignments forms are the same for cost centers and departments.
Assignment name—Type a unique assignment name.
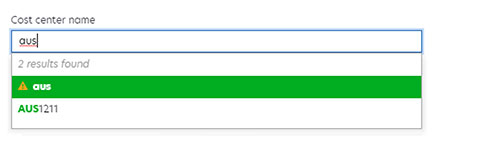
Cost center name or Department name—Type the name of the cost center or department that will be associated with this assignment. A list of possible matches is shown as characters are entered.
Notes:
- The cost center or department chosen must match one in the Account Management portal. If the name entered does not match, the caution symbol is shown before the name.
- You can apply only one cost center or department to a Direct Print assignment.
- A cost center or department can only be associated with one Direct Print Assignment.
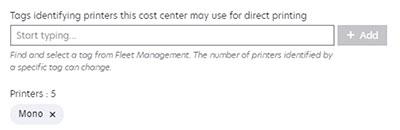
Tags identifying printers this cost center may use for direct printing—Printer tags are used to create the connection between a Direct Print Assignment and one or more printers. Type the tag name to be associated with this assignment. Multiple tags can be associated with a Direct Print assignment. Select a tag name from the list, and then click Add.
Notes:
- You can use only tags that were previously defined in the Fleet Management portal.
- When a tag is added, tag names and the total number of printers with the added tag names appear.
- You can associate an assignment to up to ten printers only. While you can save an assignment with more than ten printers, you cannot download a Print Client package associated with that assignment.
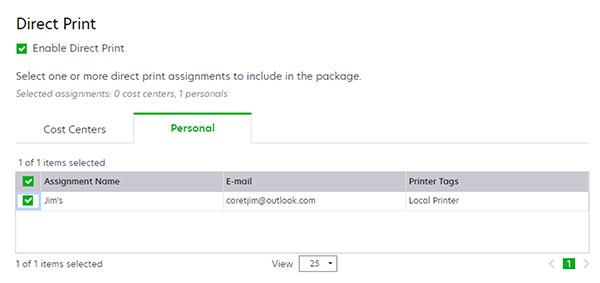
Personal—Apply assignments only to specific individuals.
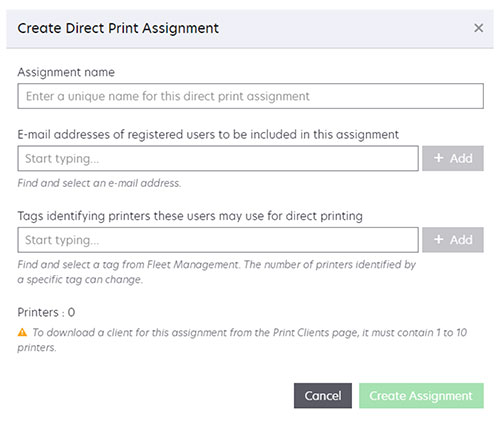
Assignment name—Type a unique assignment name.
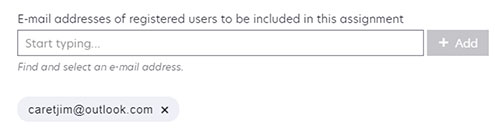
E-mail addresses of registered users to be included in this assignment—Type the email address of an individual associated with this assignment. Multiple individuals can be associated with the same Direct Print assignment.
Note: Only users with the Direct Print Release User or Direct Print Release Administrator User role are shown.
Tags identifying printers these users may use for direct printing—Printer tags are used to create the connection between a Direct Print Assignment and one or more printers. Type the tag name to be associated with this assignment. Multiple tags can be associated with a Direct Print assignment. Select a tag name from the list, and then click Add.
Notes:
- You can use only tags that were previously defined in the Fleet Management portal.
- When a tag is added, tag names and the total number of printers with the added tag names appear.
- You can associate an assignment to up to ten printers only. While you can save an assignment with more than ten printers, you cannot download a Print Client package associated with that assignment.
Click Create Assignment.
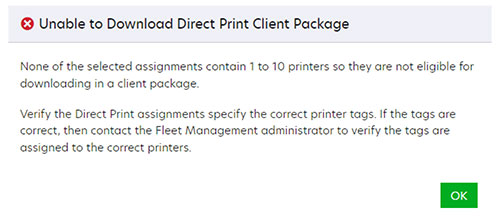
Download Direct Print Client Package Error
If you include an assignment containing more than ten printers when creating a direct print client package, then client package download fails. The Direct Print assignment that contains more than ten printers must be modified to reduce the number of printers to ten or less. The following error message is displayed when a download fails.
Using Direct Print clients
To use Direct Print, you must install a Direct Print–capable version of the Lexmark Print Management Client (LPMC) on a user’s workstation.
Downloading a Direct Print client package
You can download the LPMC configured for Direct Print from the Print Clients tab in the Print Management portal. You can create either a default Direct Print package or a Custom Package.
Direct Print—Creates an LPMC package that only supports Direct Print.
Custom Package—Allows you to create an LMC package that supports Direct Print along with Cloud Print Management, Hybrid Print Management, or both. For more information on creating a customer client package, see Using Cloud Print Management clients.
Notes:
- Direct print is only available for the Windows operating system.
- The minimum LPMC version is 2.3.1145.0.
- The LPMC must be installed with a Direct Print configuration file for Direct Print to be available to the user
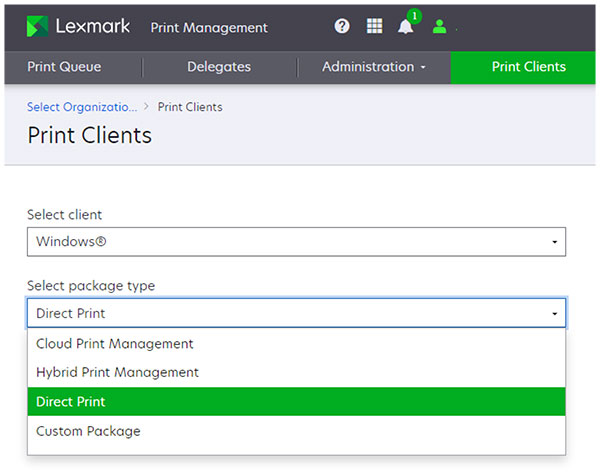
Selecting a default Direct Print packageFrom the Print management portal, click Print Clients.
In the Print Clients page, do the following:
From the Select client menu, select Windows®.
From the Select Package Type menu, select Direct Print.
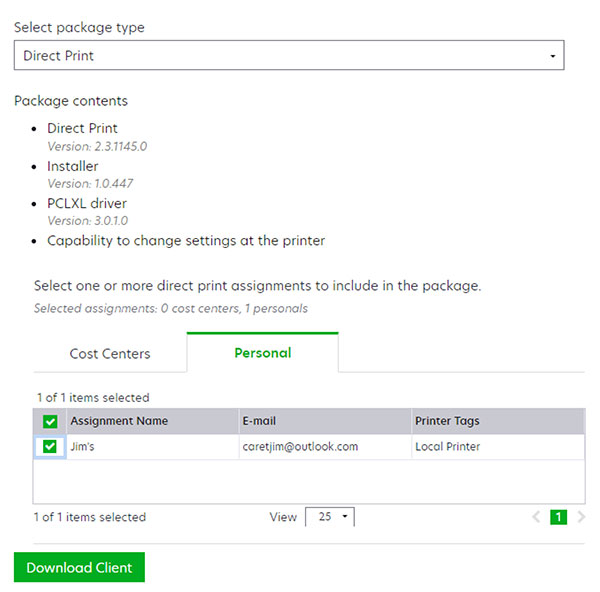
Select one or more Direct Print assignments, and then click Download Client.
Note: The package is a compressed file that must be extracted before installation.
Creating a custom Direct Print packageYou can create a Direct Print package that can include either Cloud Print Management or Hybrid Print Management or both.
From the Print management portal, click Print Clients.
In the Print Clients page, do the following:
From the Select client menu, select Windows®.
From the Select Package Type menu, select Custom Package.
Click Create Package.
Select any of the following:
Select one or more Direct Print assignments, and then click Download Client.
Note: The package is a compressed file that must be extracted before installation.
Installing Direct Print clients on workstations
After downloading default LPMC client applications, from the Client Download page, you can install them on workstations. For custom packages, you must extract the downloaded file before installing them.
For more information on the LPMC, see Installing the Lexmark Print Management Client.
Printing with Direct Print
You can submit print jobs by clicking File >Print from desktop applications, and then selecting a Direct Print queue. Using Direct Print to submit jobs is supported in desktops only, not in mobile devices.
Using a secure login code
Using a secure login
User logins can be handled in various ways with Cloud Print Management. One method is the use of a secure login code, a one-time authentication code that lets users log in to a cloud-enabled printer. Secure login can be used when the badge or PIN login method is not configured, or the user does not have a badge or PIN available. A new secure login code must be obtained from Lexmark Cloud Services each time a user logs into a cloud-enabled printer.
Notes:
- The secure is valid for 15 minutes.
- Secure login code is available when identity federation is used.
- A secure login code can be obtained from the Lexmark Cloud Services Print Management web portal and from the Lexmark Print application on iOS or the Android devices.
Setting up secure login
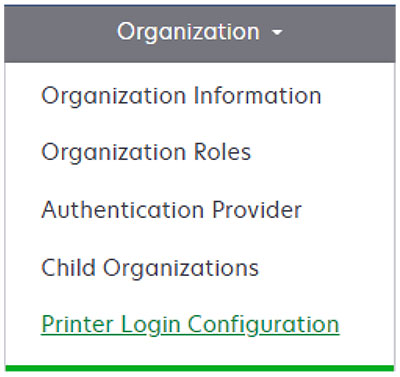
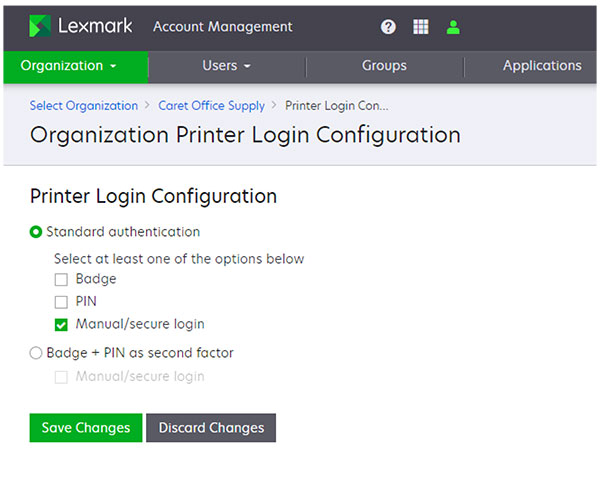
From the Account Management portal, click Organization > Printer Login Configuration.
In the Printer Login Configuration page, select Standard authentication > Manual/secure login. For more information, see Configuring printer login.
Click Save Changes.
Obtaining a secure login code
You can obtain a secure login code in the following ways:
From the My Account page in the Lexmark Cloud Services portal
From the Lexmark Print application on a mobile device.
From the web address: https://us.iss.lexmark.com/device for North America, and https://eu.iss.lexmark.com/device for Europe.
European | eu |
North American | us |
From the My Account page
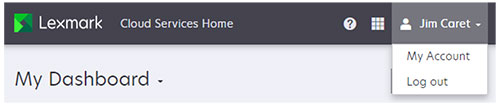
From the Lexmark Cloud Services portal, click your account name, and then click My Account.
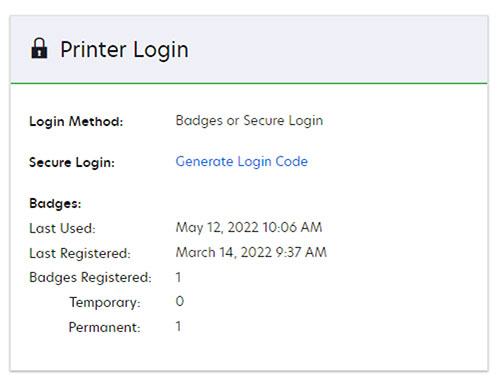
In the Printer Login section, click Generate Login Code.
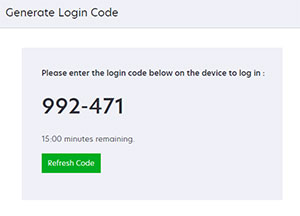
Use the secure login code shown to login to a cloud-enabled printer.
Note: A secure login code is only valid for 15 minutes. After 15 minutes, you can obtain a new code by clicking Refresh Code.
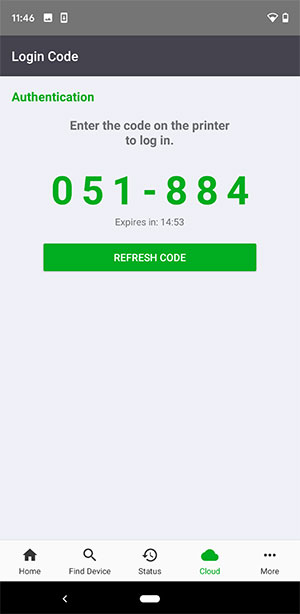
From the Lexmark Print application
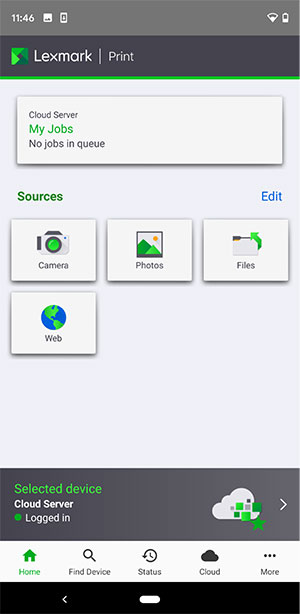
Open the Lexmark Print application on a mobile device.
Log in to the Lexmark Cloud Services portal.
Touch the Cloud icon at the bottom of the screen.
Notes:
- A secure login code will be shown.
- A secure login code is only valid for 15 minutes. After 15 minutes, you can obtain a new code by clicking Refresh Code.
From the web address
Open a web browser.
Go to: https://<env>.iss.lexmark.com/device.
European | eu |
North American | us |
Note: To determine the value of <env>, see the address on the browser address field when you log in to your Lexmark Cloud Services portal.
Use the secure login code shown to login to a cloud-enabled printer.
Note: A secure login code is only valid for 15 minutes. After 15 minutes, you can obtain a new code by clicking Refresh Code.
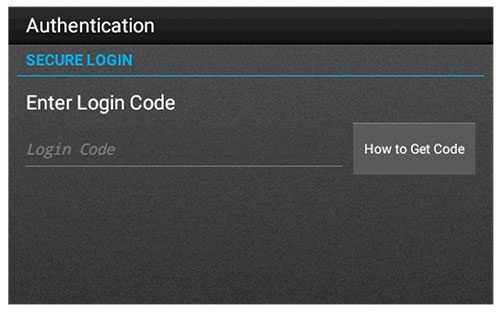
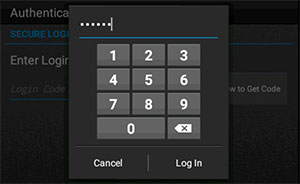
Using a secure login code
When secure login is enabled for an organization, the Secure Login icon will appear on the control panel.
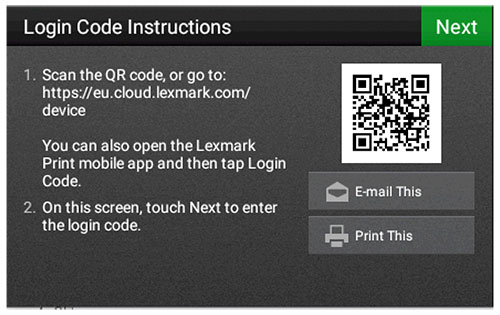
From the printer home screen, touch Secure Login.
Touch the Login Code prompt.
Enter the secure login code, and then touch Log In.
Note: For more information on obtaining secure login code, either touch
How to Get Code on the control panel or see
Obtaining a secure login code.