Managing views
The Views feature lets you customize the information that is shown in the printer listing page.
Create a view
-
From the Printers menu, click Views.
-
Click Create.
-
Type a unique name for the view and its description.
-
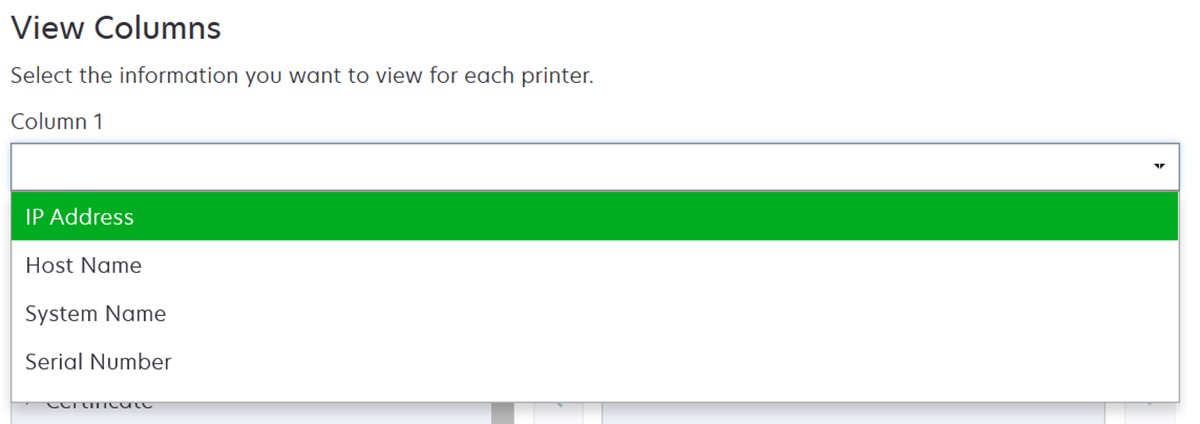
From the View Columns section, in the Column 1 menu, select the identifier column.
-
From the Possible columns section, expand a category, select the information that you want to show as a column, and then click >.
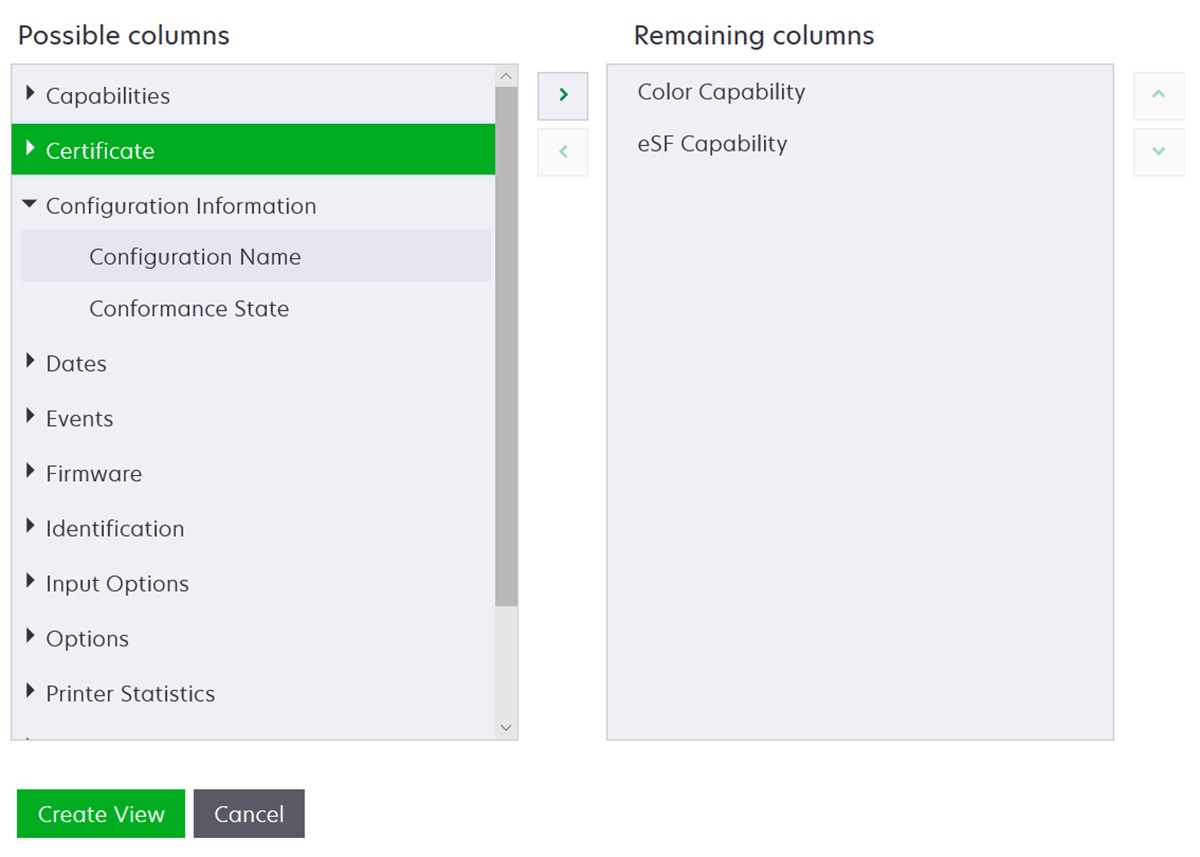
- Capabilities—Shows whether the selected features are supported on the printer.
- Certificate—Shows the printer certificate creation date, enrolment status, expiration date, renewal date, revision number, certificate subject, validity, and signing status.
- Configuration Information—Shows configuration-related printer information, such as conformance, configuration name, and state.
- Dates—Shows the last audit, last conformance check, last discovery, and the date the printer was added to the system.
- Events—Shows event-related printer information.
- Firmware—Shows firmware‑related information, such as the firmware version.
- Identification—Shows information about the printer, such as the IP address, host name, and serial number.
- Input Options—Shows information about the input options, such as the tray size and media type.
- Options—Shows information about the printer options, such as hard disk and flash drive.
- Printer Statistics—Shows information about the printer usage, such as the number of printed or scanned pages, and total number of faxed jobs.
- Solutions—Shows the eSF applications installed on the printer, and their version numbers.
- Status—Show the printer and supplies status.
- Supplies—Shows supplies‑related information.
- Printer Ports—Shows ports‑related information.
Note: An Unknown option in the port value means that either the port does not exist on the printer or MVE cannot retrieve the port.
- Printer Security Options—Shows TLS and Cipher information.
-
Click Create View.
Edit a view
-
From the Printers menu, click Views.
-
Select a view.
-
Click Edit, and then edit the settings.
-
Click Save Changes.
Copy a view
-
From the Printers menu, click Views.
-
Select a view.
-
Click Copy, and then configure the settings.
-
Click Create View.
Delete views
-
From the Printers menu, click Views.
-
Select one or more views.
-
Click Delete, and then confirm deletion.
Set a default view
-
From the Printers menu, click Views.
-
Select a view.
-
Click Set As Default.
The following views are system‑generated, and cannot be edited or deleted:
- Configuration
- Printer List
- Event
- Security
- Service Desk
- Standard